
This post may contain affiliate links. If you buy through links on this page, we may earn a commission at no extra cost to you.
As an Amazon Associate I earn from qualifying purchases.
Compost is the closest thing gardening has to free magic. It’s made from stuff you’d otherwise throw away, it costs nothing but a little effort, and it improves nearly everything about your soil: drainage in clay, water retention in sand, and a slow, steady supply of nutrients your plants actually want. Store-bought fertilizer feeds plants for a season. Compost feeds the soil — and the soil feeds your plants for years.
Here’s the part most guides skip: making it is far simpler than it sounds. You don’t need a chemistry degree or expensive equipment. You need a pile of the right materials, a little water, and some patience. If you can rake leaves and save vegetable scraps, you already know enough to start.
In this guide, you’ll learn what compost actually is (and what the microbes are doing in there), the one greens-and-browns ratio that matters, how to choose a bin, what never to compost, how to build and tend your pile, and how to fix the handful of problems beginners run into. By the end, that bag of leaves on the curb will look like the resource it is.
What Compost Actually Is
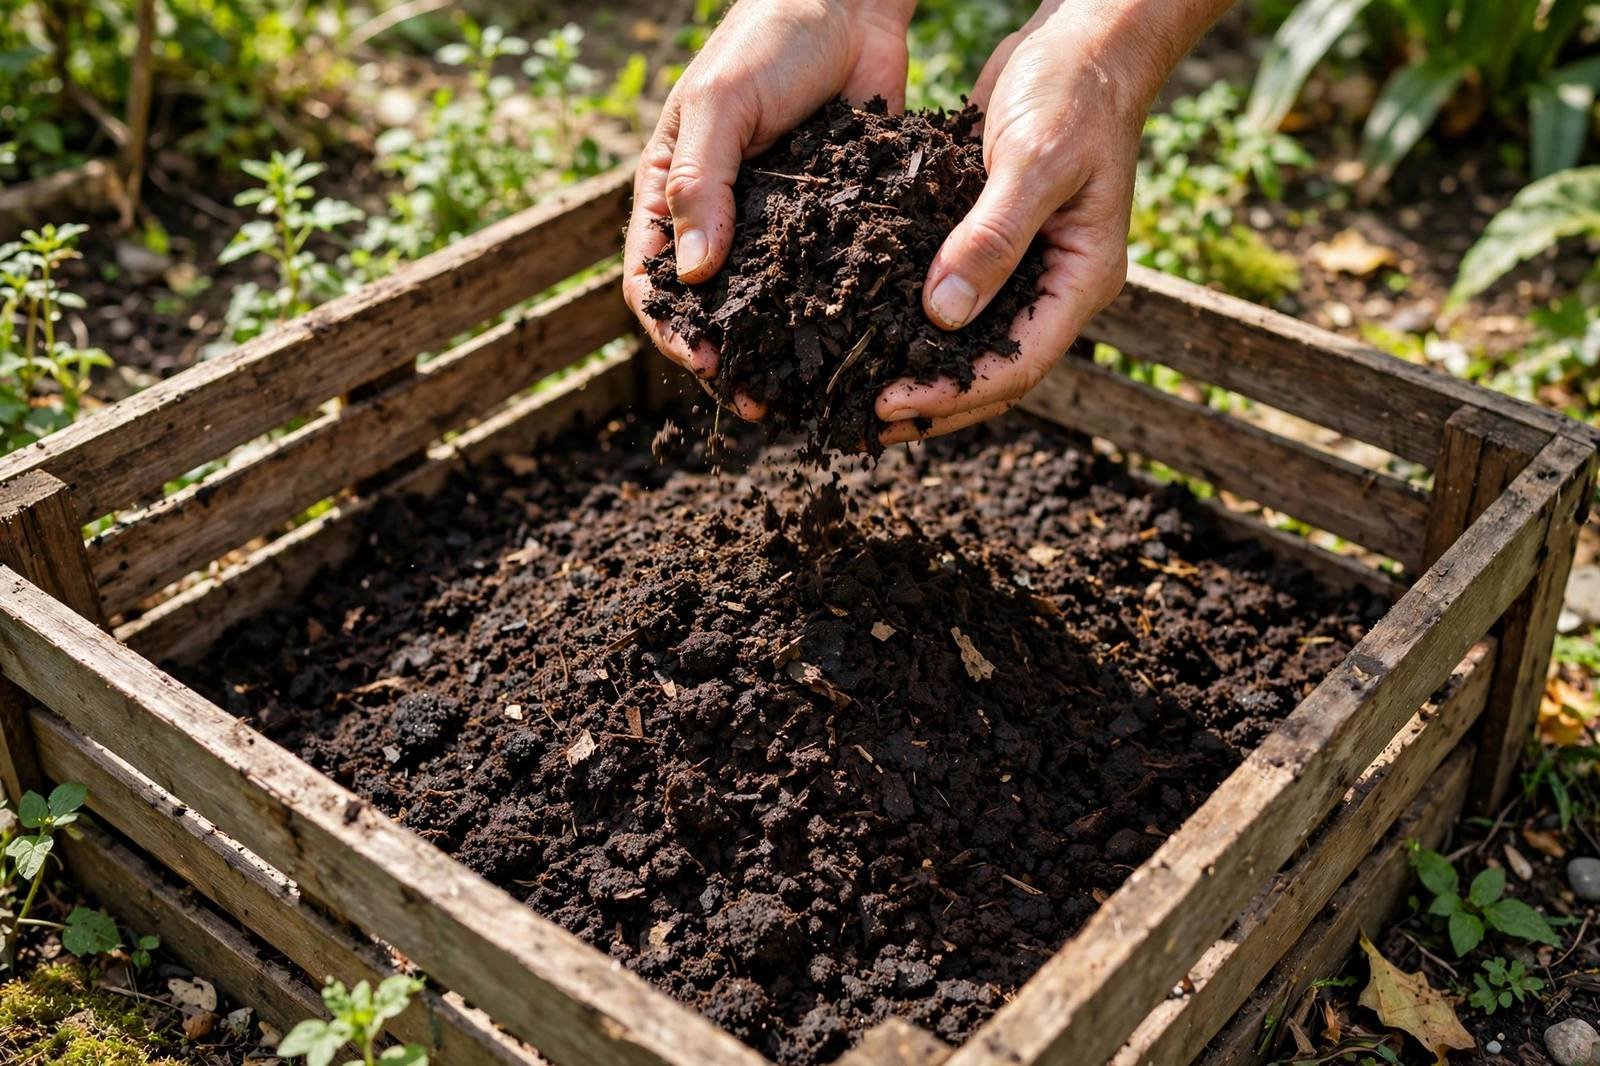
Compost is decomposed organic matter — kitchen scraps, leaves, and yard trimmings broken down by microbes, fungi, and eventually earthworms into a dark, crumbly material that smells like a forest floor. When you work it into your garden, it adds organic matter that loosens heavy soil, helps sandy soil hold water, feeds the beneficial life in the ground, and releases nutrients slowly over time instead of all at once.
A quick peek at the science, minus the textbook: the heavy lifting is done by bacteria and fungi that eat carbon for energy and nitrogen to build their bodies. When they have the right balance of both — plus air and moisture — they multiply fast, and their activity generates real heat. A working pile can reach 130 to 150°F in the center. That’s why a steaming pile is a happy pile: the heat is the visible sign that decomposition is humming along. As the easy food runs out, the pile cools, worms and fungi move in to finish the job, and you’re left with stable, earthy humus.
Think of composting as recycling with a purpose. Every eggshell, coffee ground, and fallen leaf is a resource your soil is waiting for. Gardeners who compost consistently tend to buy less fertilizer and water less often over time — not because compost is magic, but because healthy, organic-rich soil grows resilient plants.
Greens vs. Browns: The Only Ratio You Need to Learn
Everything you compost falls into one of two categories, and getting the balance roughly right is the whole secret. Don’t overthink it — “roughly right” genuinely works.
Greens are nitrogen-rich materials. They’re usually moist, fresh, and break down quickly:
- Vegetable and fruit scraps
- Coffee grounds and tea bags (remove any staples)
- Fresh grass clippings
- Fresh garden trimmings and pulled weeds — before they set seed
- Eggshells (rinse them; they break down slowly but add useful calcium)
Browns are carbon-rich materials. They’re usually dry and break down slowly:
- Dry fallen leaves — the single best brown for most households
- Shredded cardboard and newspaper (plain, no glossy or colored print)
- Straw and hay (hay may contain weed seeds; straw is the safer pick)
- Wood chips and small twigs
- Shredded paper and paper towels (used on food, not cleaning chemicals)
Two beginner trip-ups worth knowing: coffee grounds count as a green even though they’re brown in color — it’s the nitrogen that matters, not the shade. And shredded paper is a brown, which surprises people who assume anything from the kitchen is a green.
Aim for roughly 25 to 30 parts carbon to 1 part nitrogen — but nobody expects you to do that math at the pile. In plain terms, that’s about two to three times more browns than greens by volume. A bucket of kitchen scraps gets buried under two or three buckets of dry leaves or shredded cardboard. Most extension services describe this ratio as a target, not a rule: a pile that’s a little heavy on browns just decomposes more slowly, which is the safest direction to err in.
Choosing a Bin: Four Options
You don’t strictly need a bin — a simple pile works fine — but some kind of container keeps things tidy, keeps materials from blowing around, and helps the pile hold the heat it needs.
The Simple Pile
Just heap your materials in a corner of the yard. Cost: nothing. The downside is that it looks a bit wild, and a loose pile sheds heat faster, so it can take longer to finish. Still, this is a completely legitimate way to start — especially if you have the space and don’t mind the rustic look. Many experienced gardeners never use anything else.
The DIY Pallet Bin
Three or four wooden pallets wired or screwed together make an excellent bin: sturdy, often free for the asking, and open enough between the slats for good airflow. Line the inside with hardware cloth if bits of material keep falling through the gaps. If you can manage it, build two side by side — turning the pile then becomes as simple as forking it from one bin into the other, which mixes everything beautifully.
The Store-Bought Bin
Enclosed plastic bins — the black, Dalek-looking ones you see at garden centers — keep things neat, hold heat and moisture well, and deter rodents. They’re compact, which suits small yards. The trade-off: most are on the small side, so they can struggle to reach the 3-foot mass that generates the best heat, and composting may take a little longer. A fine choice for patient beginners with limited space.
The Tumbler
A barrel on a frame that you spin to mix. Turning is nearly effortless — a few cranks every week or two — and the sealed design keeps pests out completely, which matters if rats or raccoons patrol your neighborhood. Downsides: tumblers are the priciest option, capacity is limited, and the mix can dry out faster since it’s off the ground and gets good airflow. Best for small households without much yard waste. If a tumbler suits your situation, searching for a compost tumbler will show you the common drum sizes — bigger is generally better if you have the space for it.
The honest recommendation for most beginners: build a pallet bin, or start with a simple pile if the budget is zero. Composting is a habit first and a system second — you can always upgrade the container once the habit sticks.
What NOT to Compost
Some things cause more trouble than they’re worth in a home pile. Keep these out:
- Meat, fish, and dairy. They smell as they break down, attract rodents and raccoons, and decompose slowly in a home pile.
- Fats, oils, and grease. They coat materials, slow decomposition, and go rancid. Small amounts on a paper towel are fine; a pan of bacon grease is not.
- Dog and cat waste. It can carry pathogens that home piles don’t reliably get hot enough to kill. (Herbivore manure — rabbits, chickens, horses — is a different story and composts well.)
- Diseased plants. If your tomatoes had blight or your squash had powdery mildew, bag those plants for the trash — don’t compost them. Most home piles don’t sustain the temperatures needed to kill plant pathogens reliably.
- Weeds that have gone to seed. The seeds often survive a home pile, and you’ll spread them right back into your beds. Weeds pulled before seeding are perfectly fine greens.
- Glossy or colored paper and cardboard. The inks and coatings aren’t something you want in your soil. Stick to plain brown cardboard and newsprint.
- “Compostable” bioplastic bags and utensils. Most are designed for industrial composting facilities, not backyard piles — they’ll sit there looking smug for months.
Building the Pile
Now the fun part. Pick a spot that’s convenient to both the kitchen and the garden — if the pile is a long hike, you’ll quietly stop using it. Partial shade is ideal (full sun dries piles out fast), and level ground with decent drainage works best. A spot near a water source saves a lot of hauling.
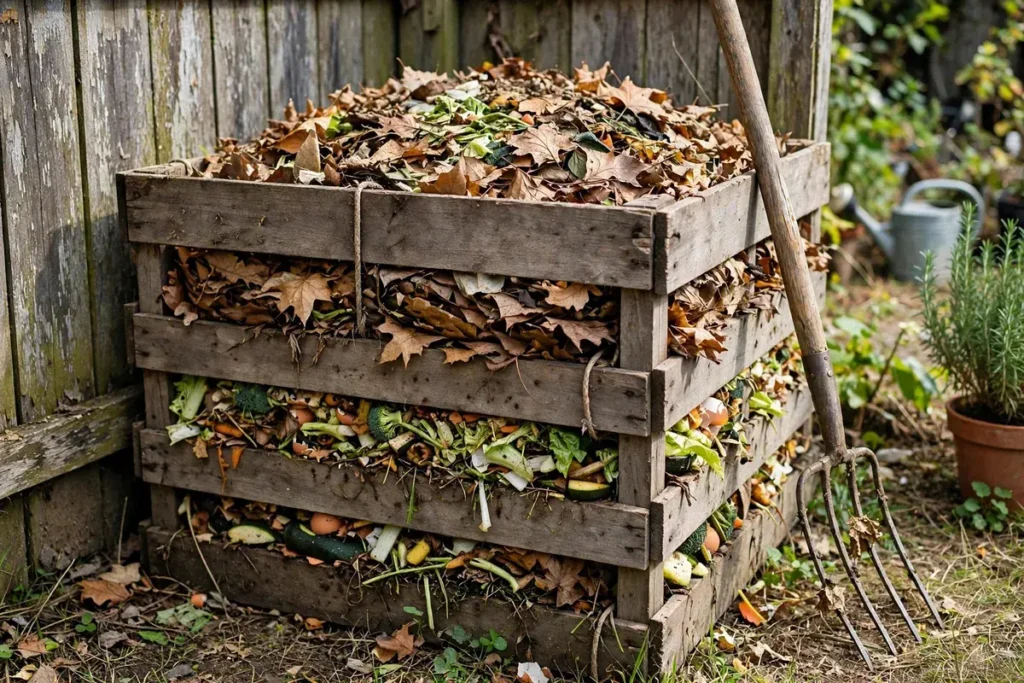
Aim for a pile roughly 3 feet by 3 feet by 3 feet. That size is the sweet spot most extension guides cite: big enough to insulate itself and heat up in the center, small enough to turn by hand. A pile much smaller than that struggles to get hot — it’ll still decompose, just slowly, like a cold pile.
Build it in layers:
- Start with a 4 to 6-inch base of coarse browns — small branches or wood chips. This lets air flow in from underneath, which matters more than most beginners expect.
- Add a 4 to 6-inch layer of browns: dry leaves, shredded cardboard, straw.
- Add a 2 to 3-inch layer of greens: kitchen scraps, grass clippings, coffee grounds.
- Water each layer lightly as you go — damp, not soaked. It’s much easier to wet layers now than to soak a finished pile later.
- Repeat the brown-green layering until the pile reaches about 3 feet tall.
- Cap the whole thing with a thick layer of browns — 4 to 6 inches. This is your odor and fly insurance.
Bury food scraps under several inches of browns every time you add them, not just at the start. This single habit prevents most fruit fly problems and nearly all odor complaints. Think of browns as the blanket that keeps the greens working quietly underneath.
Moisture: Like a Wrung-Out Sponge
Your pile should feel like a wrung-out sponge — damp to the touch, but not dripping. Microbes need water to work, but too much water fills the air pockets between materials, the pile goes anaerobic (oxygen-starved), and that’s when things start to stink.

In practice: water the pile when you build it, and again whenever it looks dry — roughly once a week in dry weather, less after rain. Do the squeeze test: grab a handful from the middle of the pile. If water runs out, it’s too wet — add dry browns and turn it. If the handful crumbles without holding together, it’s too dry — water it. An uncovered pile in a rainy climate rarely needs watering at all. A tumbler in a dry climate might want a splash every week. After a while this becomes second nature, like checking whether a houseplant needs water.
Turning: Adding Oxygen
Turning the pile mixes materials, works oxygen back in, and moves the cooler outer layers into the hot center where the real action happens. Turn every 1 to 2 weeks with a pitchfork — that’s frequent enough for most home piles. A compost aerator tool (a long corkscrew-style handle you twist down into the pile) is a lower-effort alternative if forking a full pile sounds like a workout. If you’re using a tumbler, give it a few spins on the same schedule.
Don’t stress about getting this exactly right. A pile turned once a month will still become compost; it’ll just take longer. The piles that fail are the ones that never get touched at all — not the ones turned a few days late. Consistency beats perfection here, as in most of gardening.
Troubleshooting: What Your Pile Is Telling You
Nearly every compost problem has a simple cause and a simple fix. Here’s how to read what your pile is saying.

It smells bad (rotten eggs, ammonia)
Too wet, too many greens, or not enough air — usually all three together. The fix: add a generous layer of dry browns and turn the pile to work oxygen back in. The smell typically fades within a day or two once air gets back into the mix. A healthy pile smells earthy, like soil after rain — if yours doesn’t, it needs browns and air.
It’s slimy
Same family of causes, same fix — too many greens matted together, and grass clippings are the usual culprit. (A thick layer of fresh clippings mats into a slimy sheet almost overnight.) Break up the mats with a fork and mix in shredded cardboard or dry leaves until the texture looks fluffy again. In the future, mix grass clippings with browns as you add them instead of dumping them in thick layers.
It’s not heating up
The pile is too small, too dry, or short on nitrogen. Work through the checklist: is it close to 3 by 3 by 3 feet? Is it sponge-damp all the way through? If both check out, add a nitrogen boost — a few buckets of fresh grass clippings or a big batch of coffee grounds — and turn it in. Within a few days the center should feel noticeably warm when you dig a hand in. A compost thermometer with a long probe takes the guesswork out of this: stick it in the center and you’ll know exactly where you stand.
It’s too dry
The pile looks dusty, nothing seems to be breaking down, and you might notice ants moving in — ants love a dry pile. The fix is straightforward: water it thoroughly, layer by layer as you turn it, until the whole mass is sponge-damp. In dry climates, a tarp or lid over the pile helps hold moisture between waterings. Ants usually move on once conditions turn damp and active again.
Fruit flies hovering around the pile
Food scraps are exposed on the surface — flies found them before the microbes did. Fix it the simple way: bury every new addition under 4 to 6 inches of browns, and make sure the pile’s cap layer stays intact. Flies can’t reach what they can’t find. If they’re already established, a fresh thick browns cap plus a few days usually clears them out.
How Long Does It Take?
This is the question everyone asks, and the honest answer is: it depends — but here are realistic ranges.
With regular turning, good moisture, and warm weather, expect finished compost in roughly 2 to 4 months. A low-effort pile you mostly leave alone will take more like 6 months to a year, and it will still get there — cold composting is a perfectly valid method, just a slow one.
What actually controls the timeline:
- Pile size. Bigger piles (near that 3-foot cube) heat up and finish faster.
- Turning frequency. More oxygen = faster decomposition.
- Moisture. Too dry stalls everything; sponge-damp keeps microbes working.
- Particle size. Shredded leaves and chopped scraps break down far faster than whole branches and whole corn cobs.
- Season. In cold climates, winter weather pauses the process — the pile goes dormant and picks back up in spring. That’s completely normal, not a failure.
If anyone promises you finished compost in exactly three weeks, be skeptical. Timelines vary hugely with climate, materials, and effort — the ranges above are what most home composters actually experience.
How to Tell It’s Done
Finished compost announces itself. Look for all three of these signs together:
- Dark brown to black in color, like rich soil.
- Crumbly with a uniform texture — you shouldn’t be able to recognize what went in. (A few twigs or eggshell bits hanging on are fine; screen them out or toss them back into the next pile.)
- Earthy-smelling, like a forest floor — never sour, ammonia-like, or rotten.
If it still looks like the original materials or smells off, it’s not done — give it more time and another turn or two. There’s no penalty for waiting; unfinished compost just needs a longer stay.
How to Use Your Compost
Screen out any large undecomposed bits (toss them back into the new pile as starter material) and put your black gold to work. This is the payoff for all that layering and turning:
- Top-dress beds with 1 to 2 inches around plants, keeping it a few inches back from stems. Nutrients wash down with rain and watering all season.
- Mix into planting holes — a shovelful per transplant gives new plants a strong start. Our tomato growing guide covers feeding heavy feeders through the season.
- Amend beds before planting by spreading 2 to 3 inches over the surface and working it into the top 6 inches of soil. This is the classic spring (or fall) bed-prep move — see raised bed gardening for beginners for soil mix recipes that start with compost.
- Stretch your potting mix — blend up to one-third finished compost into container potting mix for extra nutrition and moisture retention, as described in our container gardening guide.
- Mulch around perennials and shrubs, where it feeds the soil as it continues breaking down.
One honest caveat: homemade compost is a soil improver first and a fertilizer second. For heavy feeders like tomatoes and corn, many gardeners still supplement with a balanced organic fertilizer during the growing season. But with a steady supply of compost going into your beds each year, you’ll need less of everything else — and your soil genuinely gets better every single season.
FAQs About Making Compost at Home
Quick answers to the questions beginners ask most. Have one we missed? Ask it in the comments.
Will my compost pile smell and bother the neighbors?
A well-balanced pile smells like earth, not garbage. Bad smells mean something’s off — usually too many greens, too much water, or exposed food scraps — and the troubleshooting section above fixes all of it. Keep food buried under browns, keep the pile damp (not soggy), and your neighbors will never know it’s there. For more on being a considerate gardener through the seasons, see our fall garden cleanup checklist.
Can I compost in an apartment?
Yes — just not with a 3-foot outdoor pile. A small sealed tumbler or bokashi bucket on a balcony handles kitchen scraps for apartment dwellers, and vermicomposting (worm bins) works entirely indoors. The greens-and-browns principles in this guide still apply; only the container changes. Starting a garden from an apartment? Our beginner’s vegetable garden guide covers small-space options.
Do I need to buy worms or a compost starter?
No. The microbes and fungi that do the composting are already everywhere — in the air, on the leaves, in your kitchen scraps. Worms will find an outdoor pile on their own once it cools into their comfort zone. Commercial starters aren’t harmful, but they’re solving a problem you don’t have.
Can I compost weeds?
Weeds pulled before they set seed are excellent greens. Weeds that have already gone to seed are the problem — the seeds can survive a typical home pile and sprout right back in your beds. When in doubt about a weedy handful, leave it out. And diseased plants always go in the trash, not the pile.
What if I just leave the pile alone and never turn it?
You’ll still get compost — this is called cold composting, and it’s how plenty of busy gardeners do it. It just takes longer: think 6 months to a year instead of a few months. Keep adding materials, keep food scraps buried, and let time and microbes do the work. Turning is a speed upgrade, not a requirement.
Where should I put finished compost first?
Wherever you’re planting hungriest crops next. Vegetable beds top the list — see our roundup of the easiest vegetables for beginners if you’re deciding what to grow in that newly enriched soil. Fall is also prime compost-spreading season: top-dress beds before winter and let the soil life work it in by spring.
More Soil & Compost Posts to Explore
- Fall Garden Cleanup: 12 Things to Do Before Winter — including feeding the pile a big batch of fall leaves
- Raised Bed Gardening for Beginners: Size, Soil, and Layout
- How to Start a Vegetable Garden for Beginners: The Complete Guide
- How to Grow Tomatoes: From Seed to Harvest
- Container Gardening for Beginners: What Grows Best in Pots
- How to Plant Garlic in the Fall: A Step-by-Step Guide
Compost turns what you’d throw away into the best thing you can give your soil — and once the habit clicks, you’ll wonder why you ever bagged your leaves for the curb. Have you started a pile yet, or is this the nudge you needed? Tell us what’s holding you back
in the comments.
Sources & Further Reading
- Composting Basics and Considerations for Growers and Landsc — University of Georgia Cooperative Extension. C:N ratio 25-30:1; 40-60% moisture (squeeze test); active temps 131-160F kills pathogens/weeds; turn ~weekly; 3x3x3 ft minimum; hot active phase 3-8 wks + 1-3 mo cure; cold 6 mo-2 yr; coffee grounds = greens; finished = dark, crumbly, earthy-smelling.apers
- Backyard Composting — University of Arizona Cooperative Extension. C/N 30:1; exclusions (pet feces, meat, dairy, grease, diseased plants); pile heats to 130-160F; turn 1-2x/month; ready 2-4 months warm season vs a year+ untended; wrung-out-sponge moisture; pleasant earthy smell when done.
- Home Composting — University of Illinois Extension. 3x3x3 ft enclosed pile minimum; wrung-out-sponge moisture; turn every 1-2 weeks; exclusions incl. meat, pet waste, dairy, diseased plants, seeded weeds, glossy paper; finished dark, crumbly, earthy; commercial starters unnecessary.
Worked Example: How Much Compost Does One Small Backyard Bin Really Make? (Our Math)
A finished pile always looks smaller than the heap we started with, so it helps to run the numbers before choosing a bin. Here is the model we use, with every assumption stated. A classic 3x3x3 ft pile holds 27 cubic feet of material, which is about 200 gallons. A two-person household adding roughly 1 gallon of kitchen scraps a day, balanced with about 2 gallons of dry leaves or shredded cardboard, puts close to 3 gallons a day into the system, so a full-size pile represents roughly two months of inputs before shrinkage does its work.
Finished compost usually lands at about half the starting volume once water leaves and materials break down, so that 27 cubic feet of fresh inputs settles to roughly 13 cubic feet of finished compost. Spread 1 inch deep, 13 cubic feet covers about 156 square feet — close to five 4×8 ft beds at once. A compact 37-gallon tumbler works on the same math at a smaller scale: one chamber fills in about five weeks at the scrap rate above, then cooks while the second chamber takes over. Our roundup of compost bins for small backyards compares enclosed bins, tumblers, and worm bins by footprint and capacity, and our guide to starting compost in a small backyard covers placement and the first month of management.
The practical takeaway is to size the bin to your scraps, not to your ambitions. One well-fed bin that finishes two batches a year beats an oversized pile that never heats up, and the finished compost goes straight into beds and containers — the same material we break down bag by bag in our guide to potting mixes for container vegetables.