
This post may contain affiliate links. If you buy through links on this page, we may earn a commission at no extra cost to you.
Looking for more crops? Browse all of our Vegetable Growing Guides.
As an Amazon Associate I earn from qualifying purchases.
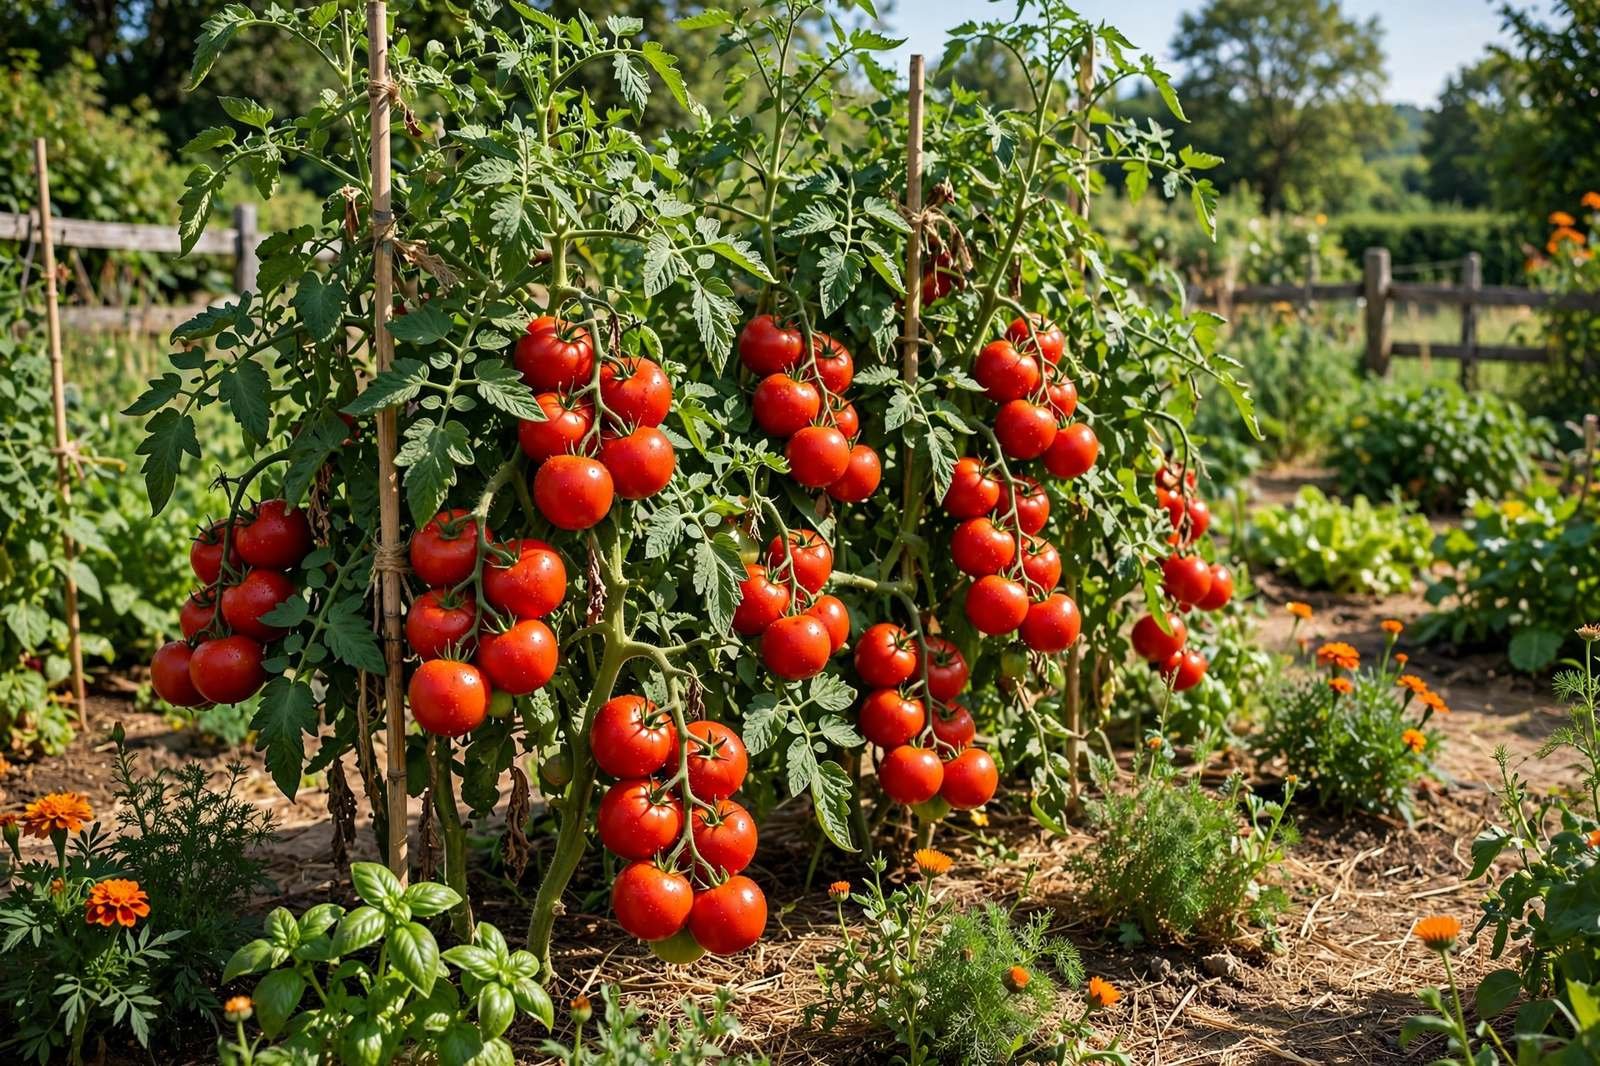
Nothing tastes like a tomato you picked yourself, still warm from the sun. The ones at the store were harvested green and gassed red on a truck; yours ripen on the vine, and that first bite tends to convert people for life.
Tomatoes carry a reputation for being fussy, but most tomato failures trace back to a handful of avoidable mistakes: planting out too early, watering in fits and starts, and picking a variety that doesn’t suit the space. Get those three right, and tomatoes are one of the most rewarding crops a beginner can grow.
This guide pulls together what university extension services and seasoned growers consistently recommend — the timing, the techniques, and the variety picks that hold up year after year. No folklore, no hype, just the practices that actually work.
In this guide you’ll learn the one distinction that changes everything about how you grow tomatoes, how to choose from hundreds of varieties without drowning in options, how to start strong from seed or seedlings, and how to fix the five problems that trip up nearly everyone. Let’s get planting.
Quick Care Overview
| Care point | What tomatoes want |
|---|---|
| Scientific name | Solanum lycopersicum (nightshade family) |
| Light | Full sun — at least 6 to 8 hours of direct sun daily |
| Water | 1 to 2 inches per week, deep and consistent; water the soil, not the leaves |
| Soil | Well-drained loam rich in organic matter, pH 6.0 to 6.8 |
| Temperature | Seeds germinate at 70–75°F; transplant after nights stay above 50°F; fruit sets best between 55 and 85°F |
| Fertilizer | Balanced fertilizer or compost at planting; lower-nitrogen feeding once fruit sets |
| Common pests | Hornworms, aphids, cutworms, whiteflies |
Determinate vs. Indeterminate: The One Thing to Understand First
Every tomato variety falls into one of two growth habits, and it changes how you plant, support, and prune. Learn this distinction once and half the confusion around tomatoes disappears.
Determinate tomatoes grow to a fixed size — usually 3 to 4 feet — set most of their fruit in a concentrated window, then wind down. They stay compact, need little to no pruning, and work well in containers. Grow these when you want a big batch of fruit all at once for canning or sauce.
Indeterminate tomatoes keep growing and producing until frost kills them, with vines that can reach 6 to 8 feet or more. They need sturdy support and some pruning, but they hand you a steady trickle of fruit all season. Most cherry tomatoes and heirlooms are indeterminate.
The seed packet or plant tag always lists the type. Check before you buy, because everything below — spacing, support, pruning — depends on it. If you’re short on space, our container gardening guide covers which types behave best in pots.
Choosing Your Varieties
There are thousands of tomato varieties, which makes choosing feel paralyzing. Don’t overthink it: pick one or two from the categories below based on how you actually eat tomatoes, and lean toward proven, widely grown varieties rather than obscure novelties.
Cherry tomatoes
‘Sungold’ — An early, indeterminate cherry that ripens to golden orange. Growers consistently report exceptional sweetness with a bright, almost tropical tang, and it’s one of the first tomatoes to ripen each season (around 57 days from transplant). The vines are vigorous, so give them a tall support. Related Post: 10 Easiest Vegetables to Grow for Beginners
‘Sweet Million’ — A red cherry known for long clusters and crack resistance, which means more of the harvest actually makes it into the bowl. Indeterminate and notably productive; a solid pick if your summers bring heavy rains that split thinner-skinned cherries.
Slicers (for sandwiches and salads)
‘Celebrity’ — A determinate slicer bred for disease resistance (it carries resistance to several common wilts and viruses) and dependable production, maturing around 70 days. Because it’s determinate, it fruits heavily in a concentrated period and needs almost no pruning. One of the most forgiving first tomatoes you can plant.
‘Better Boy’ — The classic indeterminate slicer: large fruit, steady yields across a long season, and good disease resistance. It needs a tall stake or cage and regular sucker pruning, but it’s a workhorse that has stayed popular for decades for a reason.
‘Early Girl’ — An indeterminate slicer that matures in about 50 to 52 days, making it a lifesaver in short-season climates where long-season beefsteaks never quite make it. The fruit is medium-sized rather than huge, but it’s reliable where summers are brief.
‘Brandywine’ — The famous heirloom with the rich, old-fashioned flavor that converts people to heirlooms. Be honest with yourself about the trade-offs: indeterminate, around 80-plus days to maturity, lower yields than hybrids, and more prone to cracking and disease. Give it your sunniest spot, your best soil, and patience — the flavor is the reward.
Paste tomatoes (for sauce)
‘Roma VF’ — A determinate paste tomato with dense, meaty flesh and few seeds — the standard sauce tomato for a reason. Its concentrated harvest is ideal for a big weekend of canning. The “VF” in the name means resistance to verticillium and fusarium wilts.
‘San Marzano’ — The Italian heirloom prized for sauce, with sweet, low-acid flesh. Indeterminate and needing a long, warm season (roughly 78 to 85 days), so it performs best where the frost-free growing season is long enough to reach maturity. In short-season regions, ‘Roma VF’ is the safer bet.
If your local frost-free season is short, favor early varieties listed at 70 days or fewer to maturity — ‘Sungold’, ‘Celebrity’, and ‘Early Girl’ are the practical picks there.
Starting Seeds Indoors
Starting your own seeds opens up hundreds of varieties instead of the dozen at the garden center, and a packet of seeds costs less than a single nursery transplant. Here’s the timeline that works.
When: Sow indoors 6 to 8 weeks before your last spring frost date. Your local extension service publishes frost dates by county — that’s the number to work from, not the calendar. Count back 6 to 8 weeks from your area’s average last spring frost date; the calendar date varies by location and year. If you’re mapping out your whole first season, our beginner’s vegetable garden guide walks through frost-date planning step by step.
How:
- Fill seed trays or 3-inch pots with seed-starting mix — not garden soil, which is too heavy for tiny roots and can carry disease.
- Sow seeds ¼ inch deep, water gently, and cover with a humidity dome or plastic wrap.
- Keep them at 70–75°F for germination. A seedling heat mat holds that temperature effortlessly and typically brings sprouts up in 5 to 7 days.
- The moment seedlings emerge, remove the cover and get them under lights.
Light: This is where most beginners fail. A sunny windowsill is almost never enough — seedlings stretch toward weak light and turn tall, pale, and leggy. Hang a simple shop light or LED grow light 2–3 inches above the seedlings, run it 14–16 hours a day (a basic outlet timer handles the schedule), and raise it as they grow.
After sprouting: Room temperature (65–70°F) is fine. Water from the bottom when the top of the mix dries, and run a small fan nearby on low — the gentle movement builds sturdier stems. Once seedlings have two sets of true leaves, feed weekly with half-strength liquid fertilizer.
Potting up: If roots fill the cell before transplant time, move seedlings into 4-inch pots and bury them a little deeper each time. Tomatoes root along buried stems, so every potting-up builds a stronger plant.
Hardening Off
Seedlings raised indoors will go into shock if planted straight into the garden — sunburn, wilting, or outright death. Harden them off over 7 to 10 days: set them outside in sheltered shade for an hour or two on day one, then gradually increase sun exposure and time outdoors each day.
By the end of the week they should handle full sun and a full day outdoors, including a breezy afternoon. If a late cold snap threatens, bring them back inside overnight. This step feels tedious, but it’s the difference between transplants that take off and ones that sulk for three weeks.
Transplanting: Timing and Technique
When: Transplant after all frost danger has passed and nighttime temperatures stay above 50°F. Tomatoes set into cold soil just sit there, stressed, and stressed seedlings attract disease. Patience here pays off — a tomato planted two weeks “late” into warm soil usually outgrows one planted early into cold soil.

The deep-planting trick: This is the single best tomato technique there is. Tomatoes are one of the few plants that grow roots all along a buried stem. Dig a deep hole or trench, strip off the lower leaves, and bury the transplant up to its top few leaves — up to two-thirds of the stem can go underground. The buried stem sprouts roots along its length, and the plant takes off.
Spacing: determinates 18–24 inches apart; indeterminates 24–36 inches apart. Crowded tomatoes mean poor air circulation, and poor air circulation means disease. Give them room — a tomato plant always ends up bigger than you expect. Planting into a raised bed makes spacing and soil warmth easier to manage.

Support: Cage, Stake, or Trellis
Indeterminate tomatoes must be supported. Unsupported vines sprawl on the ground, where fruit rots and soil-borne disease runs rampant. Install the support at planting time — driving a stake through established roots in July is a mistake you make once.
- Cages: Use big, heavy-duty tomato cages — at least 18 inches in diameter and 5 feet tall — not the flimsy cone cages that collapse by August. Good for determinates and smaller indeterminates.
- Staking: Drive a 6- to 8-foot stake about 12 inches into the ground beside each plant and tie the main stem loosely every 8–10 inches with soft twine or fabric strips. Best for indeterminates you’ll prune to one or two stems.
- Trellis: A string trellis or cattle-panel arch suits a whole row of indeterminates, keeps fruit clean and easy to pick, and costs less per plant than individual cages.
Watering
Tomatoes want deep, consistent watering — 1 to 2 inches per week from rain or irrigation, more in extreme heat. “Consistent” is the operative word: wildly uneven watering causes cracked fruit and blossom end rot, the two most common tomato complaints.
- Water the soil, not the leaves. Drip lines or soaker hoses are ideal. Overhead watering wets the foliage and invites blight.
- Mulch 2–3 inches deep with straw or shredded leaves after the soil warms up. Mulch keeps moisture even and stops soil from splashing onto lower leaves — the main way early blight spreads.
- Water in the morning so any foliage that does get wet dries quickly.
A rain gauge or even a tuna can in the bed tells you how much rain actually fell — guessing usually underestimates it.
Fertilizing
Tomatoes are hungry, but timing matters more than quantity.
- At planting: Mix a balanced fertilizer (like 10-10-10) or a few handfuls of compost into the planting hole.
- Once fruit sets: Switch to a lower-nitrogen fertilizer. Too much nitrogen grows a giant, leafy plant with few tomatoes. A tomato-specific or bloom-boosting formula fits here. Related Post: How to Make Compost at Home
- Container tomatoes need feeding every 2–3 weeks through the season, since watering leaches nutrients out of pots fast.
If your plants are deep green and lush but nearly flowerless, you’re overfeeding nitrogen. Back off and let them get a little hungry — mild stress pushes tomatoes toward fruiting.
Pruning Suckers (Indeterminates Only)
A “sucker” is the little shoot that grows in the joint where a leaf branch meets the main stem. On indeterminate varieties, each sucker becomes another stem — which means more fruit but a tangled, disease-prone jungle with poor air flow.
For most home gardeners, pruning to one or two main stems is the sweet spot: pinch suckers off while they’re small (under 2–3 inches) by snapping them with your fingers. Do it weekly — it’s a pleasant five-minute garden task, and small wounds heal fast.
Don’t prune determinate varieties this way. They set a fixed amount of fruit, so removing suckers just removes tomatoes. Also leave the leaves that shade developing fruit — sunscald on exposed fruit is a real problem in hot climates.
Troubleshooting Common Problems
Nearly every tomato problem a beginner meets is one of these five. They’re all manageable once you know what you’re looking at.

Blossom End Rot
A dark, sunken, leathery spot on the blossom end of the fruit. Despite the name, it’s rarely a true calcium deficiency in the soil — it’s almost always inconsistent watering preventing the plant from taking calcium up. Water deeply and evenly, mulch well, and newly forming fruit will be fine. Don’t rip the plant out; it’s a watering problem, not a death sentence.
Splitting and Cracking
Radial cracks around the stem end (or concentric rings) appear after a heavy rain or a big watering following a dry spell — the inside grows faster than the skin can stretch. It’s cosmetic: eat cracked tomatoes first, since the splits invite fruit flies. Consistent watering and mulch are the prevention. Some varieties, especially thin-skinned heirlooms, crack more readily no matter what you do.
Hornworms
Huge green caterpillars that can strip a plant nearly overnight. They’re camouflaged but easy to find once you look for their dark pellet droppings on leaves below the feeding damage. Handpick them — gloves help, since they’re startling the first time — and drop them in soapy water. If you spot one covered in white rice-like cocoons, leave it alone: those are parasitic braconid wasp larvae, and they’re doing pest control for you.
Blight (Early and Late)
Early blight shows as brown, target-like spots starting on lower leaves and working upward. Prevention is everything: mulch to stop soil splash, water at the base, space for air flow, and prune off the lowest 8–12 inches of leaves once the plant is established. Remove affected leaves promptly and never compost diseased foliage.
Late blight is the serious one — water-soaked spots, white mold on leaf undersides in humid weather, and fruit rot. It spreads fast and has no home-garden cure. If it appears, pull the plant, bag it, and trash it (don’t compost it) to protect neighboring plants. Choosing resistant varieties like ‘Celebrity’ or ‘Better Boy’ is your best defense.
Tomatoes Not Ripening
Fruit that sits green for weeks usually comes down to temperature. Lycopene production — the pigment that turns tomatoes red — stalls below about 50°F and above roughly 85–90°F, which is why tomatoes often pause during heat waves. They’ll resume when temperatures moderate. For fruit stuck at the pale “breaker” stage late in the season, pick it and ripen it indoors at room temperature; a paper bag with a banana speeds things along via ethylene.
FAQs About Growing Tomatoes
Can I grow tomatoes in containers?
Yes — determinates and dwarf varieties do best in pots, in a container of at least 5 gallons with drainage holes. Container tomatoes dry out fast and need feeding every 2–3 weeks. Our container gardening guide covers pot sizes and potting mix in detail.
Do I need to prune determinate tomatoes?
No. Determinates set a fixed amount of fruit, so pruning suckers just removes future tomatoes. The only pruning they need is removing the lowest leaves that touch the soil, to reduce disease splash.
How long does it take to get my first tomato?
From transplanting, expect 60 to 85 days depending on variety — early types like ‘Early Girl’ and ‘Sungold’ land at the short end, big heirlooms like ‘Brandywine’ at the long end. Add 6 to 8 weeks if you’re starting from seed indoors.
Why are my tomato leaves curling?
Physiological leaf roll — leaves curling upward along their length — is usually a stress response to heat, wind, or uneven watering, and plants typically outgrow it. Curled, stunted, twisted new growth is different and can signal herbicide contamination in compost or mulch, or a virus; in that case, remove the plant.
Should I remove the first flowers?
If you transplanted a small, leggy seedling, pinching the first flower cluster lets the plant put energy into roots and foliage first — many growers find it pays off in a stronger plant. On a stocky, healthy transplant, leave the flowers alone.
Have a tomato question we didn’t cover? Ask it in the comments — we read every one.
Harvest
Pick tomatoes at full color with a slight give under gentle pressure — that’s peak flavor. A ripe tomato also smells like a tomato at the stem end. Check plants every day or two at peak season; a cherry tomato left one day too long is a cherry tomato the birds get.
At season’s end, pick all mature green fruit before the first hard frost and ripen them indoors. And when the vines are truly spent, pull them — don’t leave diseased plants standing. Our fall garden cleanup checklist covers putting tomato beds to bed properly so next year’s plants start disease-free.
Quick-Reference Timeline
| Stage | Timing |
|---|---|
| Sow seeds indoors | 6–8 weeks before last spring frost |
| Germination | 5–10 days at 70–75°F |
| Harden off | 7–10 days before transplanting |
| Transplant outdoors | After nights stay above 50°F |
| First harvest | 60–85 days after transplant (varies by variety) |
More Tomato and Vegetable Growing Posts to Explore
- 10 Easiest Vegetables to Grow for Beginners
- How to Start a Vegetable Garden for Beginners
- Raised Bed Gardening for Beginners
- Container Gardening for Beginners
- How to Make Compost at Home
- Fall Garden Cleanup: 12 Things to Do Before Winter
Start with two or three plants your first year — a ‘Sungold’, a ‘Celebrity’, and maybe a ‘Brandywine’ if you’re feeling adventurous. Give them sun, space, steady water, and a deep planting hole. Come August, you’ll understand why gardeners get a little evangelical about tomatoes. Which variety are you planting first this year?
🛠️ Tools for this guide
What to Plant Now matches today’s date to your ZIP code, and the Frost Date Calculator gives you the frost dates behind every planting decision. Starting indoors? The Seed Starting Calendar counts back from your frost date.
Sources & Further Reading
- Colorado State University Extension — Vegetable Planting Guide: planting times, spacing, and depth for tomatoes and other warm-season vegetables.
- Texas A&M AgriLife Extension — Texas Home Vegetable Gardening Guide (PDF): variety selection, transplanting, and day-to-day care for home tomato growers.
Worked Example: Tomato Spacing and Yield Math for a 4×8 Bed (Our Math)
The spacing rules in this guide say determinates 18 to 24 inches apart and indeterminates 24 to 36 inches apart. Here is what those numbers produce in one 4×8-foot raised bed, 32 square feet, planted with two rows down the 8-foot length, one row along each long edge.
Assumptions. Row 1, north edge: 4 indeterminate ‘Better Boy’ at 24-inch spacing, each with a 6 to 8-foot stake. Row 2, south edge: 4 determinate ‘Celebrity’ at 24-inch spacing, each with a heavy-duty cage. Rows sit about 3 feet apart. Yield figures are planning estimates from typical home-garden ranges, not promises: 15 pounds per determinate plant, 20 pounds per indeterminate plant. Water need 1.5 inches per week. Mulch 2.5 inches of straw after the soil warms.
Plant count. 8 feet divided by 2 feet gives 4 plants per row, 8 plants total in 32 square feet. Each plant gets a full share of sun because the tall indeterminates sit on the north side and never shade the determinates.
Yield math. 4 ‘Celebrity’ at 15 pounds each gives 60 pounds in a concentrated window, the canning batch. 4 ‘Better Boy’ at 20 pounds each gives 80 pounds spread across the season. Total planning estimate: about 140 pounds of tomatoes from one bed. At half a pound per medium fruit, that is roughly 280 tomatoes, which explains why the guide says to start with two or three plants, not eight, unless the household is ready.
Water and mulch math. 1.5 inches of water over 32 square feet is 48 divided by 12 cubic feet, 4 cubic feet, about 30 gallons per week, split into deep waterings rather than daily sprinkles. A 2.5-inch straw mulch over the same area is about 6.7 cubic feet, near 50 gallons of mulch, roughly two to three compressed bags. At planting, one handful of compost per hole times 8 holes finishes the bed prep.
Companions and gear. Basil tucked at the bed corners shares the tomato’s warm season and watering rhythm; how to grow basil covers the pinching that keeps it leafy. Peppers want the same heat and spacing logic, so how to grow peppers is the natural second bed. Delivering 30 gallons a week without blasting foliage is a wand job, covered in best watering wands for gardeners.
Eight plants is a maximum-density plan for gardeners who preserve the harvest. Three or four plants in the same bed, spaced wider, grow with less disease pressure and still bury a household in tomatoes.