
This post may contain affiliate links. If you buy through links on this page, we may earn a commission at no extra cost to you.
As an Amazon Associate I earn from qualifying purchases.
There’s a special kind of overwhelm that hits in front of the seed rack. You came for tomatoes. Now you’re staring at forty tomato varieties, a wall of packets that all claim to be “easy,” and a little voice asking whether you even know your soil’s pH. Most beginners either freeze — or buy everything and hope for the best. Both routes usually end the same way: a weedy patch of regret by August.
You can skip that part. Starting a vegetable garden comes down to a few fundamentals — sun, soil, size, and timing — done in the right order. Get those right and your first season can genuinely feed you.
None of this is a secret. It’s the same handful of fundamentals county extension offices have taught for decades — just in the order you actually need them.
Here’s what’s ahead: the seven steps that build a garden from scratch, a short supplies list so you buy only what you need, the five mistakes that wreck most first gardens, and a concrete game plan for a 4×8 bed you can copy exactly.
What You Need to Get Started
You don’t need a shed full of gear. This is the whole starter kit, and it fits in a car trunk:
- A garden fork or spade — for loosening the top 8 to 10 inches of soil.
- Compost — a few bags from the garden center, or a bulk yard from a landscape supplier if you’re filling a raised bed.
- Mulch — a bale of straw, a bag of shredded leaves, or wood chips.
- A way to water: a hose plus a soaker hose, or a watering can if you’re starting small.
- Seeds or transplants — the forgiving crops in Step 5.
- A hand trowel for planting, and a soil thermometer — the ten-dollar tool that ends the “is it too early?” guessing game.
The total bill usually runs less than a month of grocery-store vegetables — and most of this gear lasts for years.
Step 1: Pick a Spot With 6 to 8 Hours of Direct Sun
Vegetables are solar-powered. Most of them — tomatoes, peppers, cucumbers, squash, beans — need at least 6 hours of direct, unfiltered sun a day, and 8 is better. Leafy greens can scrape by on 5, but fruiting crops will sulk in shade, growing leggy and producing almost nothing.
Watch your yard for a full day before you commit. That corner that feels sunny at 9 a.m. might sit in the house’s shadow by 2 p.m. Note where the light actually falls from mid-morning to late afternoon. Morning sun is especially valuable because it dries dew off the leaves fast, which cuts down on fungal disease.
Two more rules. Stay close to a water source — you will water more than you expect, and hauling a watering can across the yard gets old by week two. And avoid low spots where water pools after rain: soggy roots rot; vegetables want drainage, not a bathtub.
If your yard’s sunniest corner is still shady, don’t fight it — a sunny balcony often beats a shady yard. See our container gardening guide.
Step 2: Start Smaller Than You Think
A 4×4-foot bed is plenty for a first garden. If you’re feeling ambitious, go 4×8. That is the ceiling. A 4×8 bed — 32 square feet — can grow a surprising amount: a bed that size can hold six tomato plants, two rows of lettuce, a trellis of cucumbers, and a border of basil, all at once.

Why the limit? Because a garden you can tend in 20 minutes a few times a week beats a big one you abandon. Weeds, watering, and harvesting all scale with square footage, and beginners almost always overestimate their available time. You can expand next year once the habit is built.
Keep the bed no wider than 4 feet so you can reach the middle from either side without stepping on the soil — compaction is one of the quiet killers of vegetable yields. A 4×4 or 4×8 raised bed is the easiest way to hit this size with good soil from day one.
Step 3: Choose In-Ground, Raised Bed, or Containers
You have three main ways to grow, and all of them work. Pick the one that fits your space and your soil.
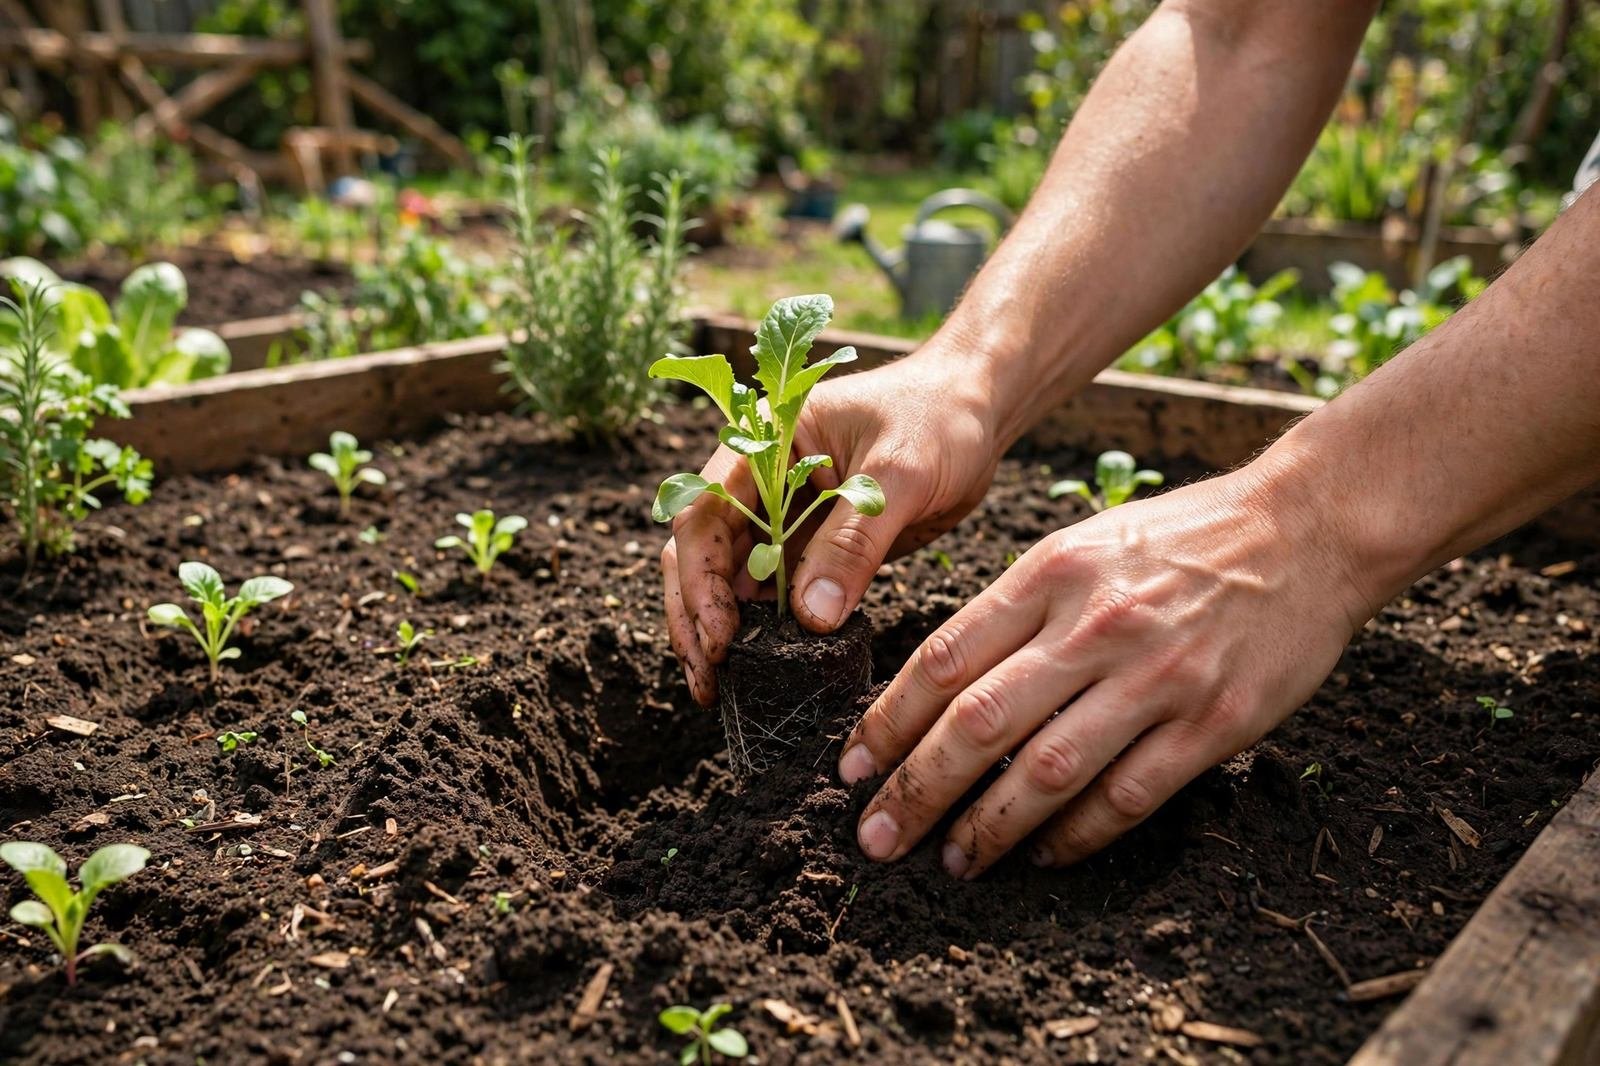
In-ground beds are the cheapest option: clear the grass, loosen the soil 8 to 10 inches deep with a garden fork, mix in compost, and plant. They dry out slower than raised beds and cost almost nothing. The downside is that you’re stuck with your native soil — if it’s heavy clay or full of tree roots, you’ll fight it all season.
Raised beds are our recommendation for most beginners. A simple 4×4 or 4×8 frame, 10 to 12 inches tall, filled with a mix of topsoil and compost, gives you good soil from day one. Drainage is excellent, the soil warms up faster in spring, and the defined edges keep the grass out. The trade-off is cost — lumber or a kit plus the soil mix — and raised beds dry out faster, so summer watering matters more. If you’d rather buy than build, pre-cut kits in cedar, metal, and budget styles are widely available.
Containers are the answer if you only have a patio or balcony. Use pots at least 12 inches deep and 5 gallons for big plants like tomatoes and peppers; 2-gallon pots work for lettuce, radishes, and herbs. Every container needs drainage holes — no exceptions. Our container gardening guide covers pot sizes and the crops that thrive in them.
If your yard soil is questionable and your budget is tight, start with a mix: one small raised bed for your main crops and a few containers for herbs and lettuce.
Step 4: Build Good Soil Before You Plant Anything
Plants don’t eat dirt; they eat what lives in it. Good vegetable soil is loose enough to crumble in your fist, dark from organic matter, and full of earthworms. Most beginners skip this step and then wonder why their plants stall in June.

The fix is compost — 2 to 3 inches of it, worked into the top 6 to 8 inches of soil. Compost feeds the soil microbes, improves drainage in clay, and helps sandy soil hold water. You can buy it bagged or in bulk from a landscape supplier. If you’re filling a raised bed from scratch, a 60/40 blend of topsoil to compost is a reliable starting mix. And if you start a compost pile this spring, you’ll have free soil food by fall.
Vegetables also prefer a roughly neutral pH, between 6.0 and 7.0. A cheap soil test kit or your county extension office can tell you where you stand. Don’t guess with lime or sulfur — amend only based on a test.
Each spring, top-dress your beds with another inch or two of compost — every harvest withdraws nutrients, and compost is the deposit.
Step 5: Grow Crops That Forgive Mistakes
Your first garden should be full of plants that practically grow themselves. Our picks — the full days-to-harvest rundown lives in 10 easiest vegetables for beginners:
- Zucchini (‘Black Beauty’ or ‘Costata Romanesco’): one plant feeds a neighborhood. Direct-sow after frost, 36 inches apart.
- Bush beans (‘Provider’): germinate in days, harvest in about 50. Sow 1 inch deep and 4 inches apart once the soil hits 60°F.
- Lettuce (‘Salad Bowl’ or ‘Buttercrunch’): cut-and-come-again — harvest the outer leaves and it regrows. Sow 8 to 10 inches apart; it tolerates light frost.
- Radishes (‘French Breakfast’): ready in 21 to 25 days, which is instant gratification for a beginner. Sow 2 inches apart.
- Tomatoes (‘Celebrity’ or ‘Early Girl’): the reason most people start gardening. Buy transplants, space them 24 to 36 inches apart, and cage them from day one. Ready for the deep dive? See how to grow tomatoes.
- Cucumbers (‘Marketmore 76’): give them a trellis and they’ll reward you. Space 12 inches apart along the trellis.
- Basil (‘Genovese’): plant it next to your tomatoes, pinch the tops regularly, and don’t let it flower if you want leaves all summer.
Skip the divas for year one. Cauliflower, celery, artichokes, and melons in short-season zones all demand more skill, space, or season length than a beginner should bet on.
Step 6: Water Deeply, and Less Often Than You Think
The most common watering mistake is a daily sprinkle. Shallow watering trains roots to stay near the surface, where they dry out fast and the plants wilt by afternoon. Deep watering pushes roots down, where the soil stays moist and cool.
Aim for 1 to 1.5 inches of water per week, rain included, in one or two deep soakings. Stick your finger 2 inches into the soil: dry at that depth, water; damp, wait. New seedlings need gentler, more frequent water for their first week or two — then switch to deep-and-rare.
Water the soil, not the leaves, and do it in the morning. Wet foliage overnight invites powdery mildew and blight. Lay the soaker hose from your supplies list under a 2- to 3-inch layer of mulch — straw, shredded leaves, or wood chips — and watering becomes a ten-minute job. That mulch dramatically cuts evaporation and keeps soil temperatures steady.
Step 7: Plant by the Frost Date, Not the Calendar
“Plant after the last frost” is the most ignored advice in gardening. Warm-season crops — tomatoes, peppers, squash, beans, cucumbers — die or sulk in cold soil. Soil below 50°F will rot bean and squash seeds outright.
Look up your area’s average last spring frost date — your county extension office publishes it — and follow the seed packet literally: “sow after last frost” means what it says. Cool-season crops — lettuce, spinach, radishes, peas — are the exception. They go in 2 to 4 weeks before the last frost and actually prefer the cool.
A soil thermometer removes all guesswork. When the soil at 4 inches deep holds 60°F or above, it’s safe for warm-season planting. Patience here is worth more than any fertilizer.
Timing works backward, too: count back from your first fall frost to see what you can still sow. See what to plant in October.
5 Beginner Mistakes That Wreck a First Garden
You now know the right moves. Here are the wrong ones — the five we see beginners repeat every single spring:
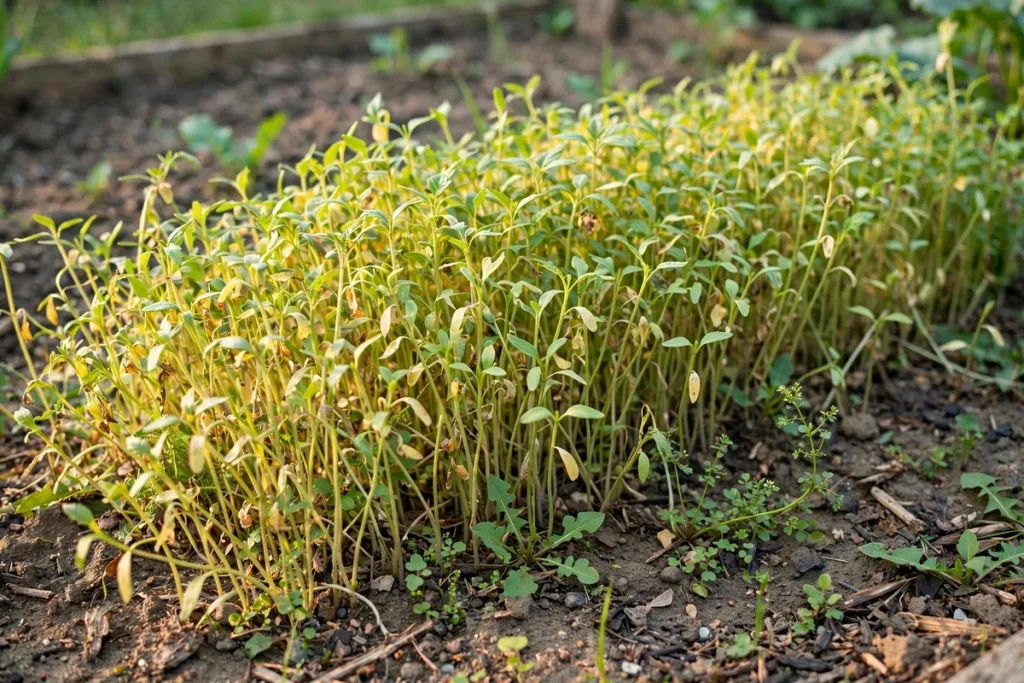
1. Planting too much
Six zucchini plants is a part-time job. One or two is plenty. Every seed packet tells you the spacing — believe it.
2. Planting too early
Cold soil kills more seedlings than any pest. Wait for your frost date and that 60°F soil reading.
3. Crowding
Seedlings look tiny and lonely; mature plants do not. Thin ruthlessly — your future self will thank you.
4. Forgetting to mulch
Bare soil crusts, dries out, and sprouts weeds. Two to three inches of mulch after plants are established solves all three problems at once.
5. Not feeding the soil
Vegetables are heavy feeders. If plants look pale and stalled mid-season despite water and sun, they’re hungry — side-dress with compost or a balanced organic vegetable fertilizer.
Your First-Season Game Plan
If you want a concrete starting point, here’s a 4×8 bed that works in most zones:
- North side: a trellis with 3 cucumber plants (‘Marketmore 76’), 12 inches apart.
- Middle: 4 tomato plants (‘Celebrity’), 24 inches apart, each with a cage.
- South edge: a row of lettuce and a row of radishes for early harvests while the big plants fill in.
- Corners: basil and a small bush bean patch.
Plant the cool-season crops about 3 weeks before your last frost and the warm-season transplants after it. Mulch everything, water deeply once or twice a week, and harvest often — picking beans, cucumbers, and zucchini young keeps the plants producing.
Your next milestone on the calendar is fall: planting garlic goes in right as summer crops wind down.
More Beginner Growing Posts to Explore
- 10 Easiest Vegetables to Grow for Beginners — days to harvest, one key tip, and a variety pick for each.
- Raised Bed Gardening for Beginners — sizes, materials, soil mixes, and how much soil to buy.
- Container Gardening for Beginners — pot sizes, potting mix, and the crops that thrive in pots.
- How to Make Compost at Home — free soil food from kitchen scraps and fall leaves.
- How to Grow Tomatoes: From Seed to Harvest — the deep dive once you’re hooked.
- Fall Garden Cleanup — 12 things to do before winter, once the season winds down.
You Don’t Need Perfect
Your first garden won’t look like a magazine photo, and that’s fine. Every season teaches you something your yard specifically wants you to know — which corner runs hot, where the shade falls in August, what the rabbits prefer.
Start small, feed the soil, water deeply, and plant on time. Do that, and you’ll be eating from your garden by midsummer.
What are you most excited to grow in your first garden? Tell us in the comments — we’d love to hear your plan.
Sources & Further Reading
- Planning a Garden — Clemson Cooperative Extension. Supports six hours of sun, starting small, and bed width.
- How to Obtain Proper Watering in Your Garden — Mississippi State University Extension. Supports one inch of water and drip/soaker use.
- Seed Germination Temperature and Timing — UC Agriculture and Natural Resources. Supports soil-temperature planting.
- Vegetable Growing Guides — Cornell University. Supports beginner-crop reference backstop.
Worked Example: A Simple Watering Plan for Your First Bed (Our Math)
A first bed usually fails on watering before it fails on anything else, so it helps to put real numbers on the plan before the season starts. Here is the model we use, with every assumption stated. Take one 4×8 ft raised bed: that is 32 square feet of soil surface. One inch of water over one square foot is about 0.623 gallons, so one inch over the whole bed is 32 x 0.623, or roughly 20 gallons. Most vegetables do well with about an inch of water a week in mild weather, and up to twice that in a hot, windy stretch, so the bed’s weekly budget lands somewhere between 20 and 40 gallons, split into two or three deep sessions instead of a daily sprinkle.
How you deliver those gallons changes the work. Hand watering with a gentle shower wand at a typical household flow can mean standing at the bed for ten minutes or more per session. A basic drip layout sized for the same bed — four lines, emitters every 12 inches, about 32 emitters at half a gallon per hour each — delivers roughly 16 gallons an hour, so about 75 minutes of run time covers the 20-gallon week in one session. Our guide to how often to water a raised bed walks through how soil type and mulch depth shift that schedule, and our roundup of drip irrigation kits for raised beds shows the kit sizes that match a first bed. If you would rather automate the sessions, a simple hose timer can run the same math on a schedule; we compare options in our guide to garden hose timers.
The beginner-friendly takeaway is simple: pick one bed size, compute its gallons-per-inch once, and water to a number instead of a guess. The plants get deep, even moisture, the foliage stays drier, and you spend your garden time on feeding and harvesting instead of standing guard with a hose.
Starting your first bed in fall
Fall is a good time to start a first bed, because the work done now pays off twice: fall crops go in right away, and the soil improves over winter before spring planting. The steps in this guide still apply, but the crop list and the timing change. Plant garlic, lettuce, spinach, and radishes in fall, and leave warm-season crops like tomatoes and peppers for spring. Garlic goes in about 4 to 6 weeks before the ground freezes, so roots form before winter; how to plant garlic in fall covers depth and spacing. What to plant in October lists more fall options by crop.
Soil prep for a fall start uses the same compost math as a spring bed, with one change: lay the compost a little thicker, since it also acts as mulch over winter. For a 4 by 8 foot bed, 32 square feet, a 2 inch compost layer is 32 times 2 divided by 12, which is 5.3 cubic feet, about 40 gallons. Spread it over the bed, water it in, and plant through it. By spring, worms and rain will have worked much of it into the soil below, and the bed will need only a light top-dress before spring sowing.
Use your local frost dates and regional planting guidance — not your USDA hardiness zone alone — to choose planting dates. A first fall bed should also get a simple winter cover plan: mulch garlic beds with straw after the ground cools, and keep a frost cover handy for lettuce and spinach when a hard freeze is forecast. When spring arrives, the bed is already built, the soil is already improved, and the only new job is sowing. Fall garden cleanup covers the end-of-season tasks that pair with this start, so the bed enters winter tidy rather than tangled.