

This post may contain affiliate links. If you buy through links on this page, we may earn a commission at no extra cost to you.
As an Amazon Associate I earn from qualifying purchases.
Yes, a grow light can burn seedlings. A light hung too close pours too much light and heat onto tender leaves, and the damage shows up fast: pale patches, curled edges, and growth that stalls. The good news is that most burned seedlings recover once you raise the light, as long as you catch the problem in the first few days.
This guide shows what light burn looks like, how it differs from other seedling trouble, and how far to hang each type of light. It also walks through a side-by-side example with two trays at two heights, so you can see the timeline of the damage and the fix.
Close vs far: what the leaves show
The clearest way to learn the signs is to compare two trays of the same seedlings under the same light. One tray sits close to the light, and the other sits farther away. The close tray shows the damage, and the far tray shows how the same plants should look. That contrast is what you want to spot on your own shelf before the damage spreads.
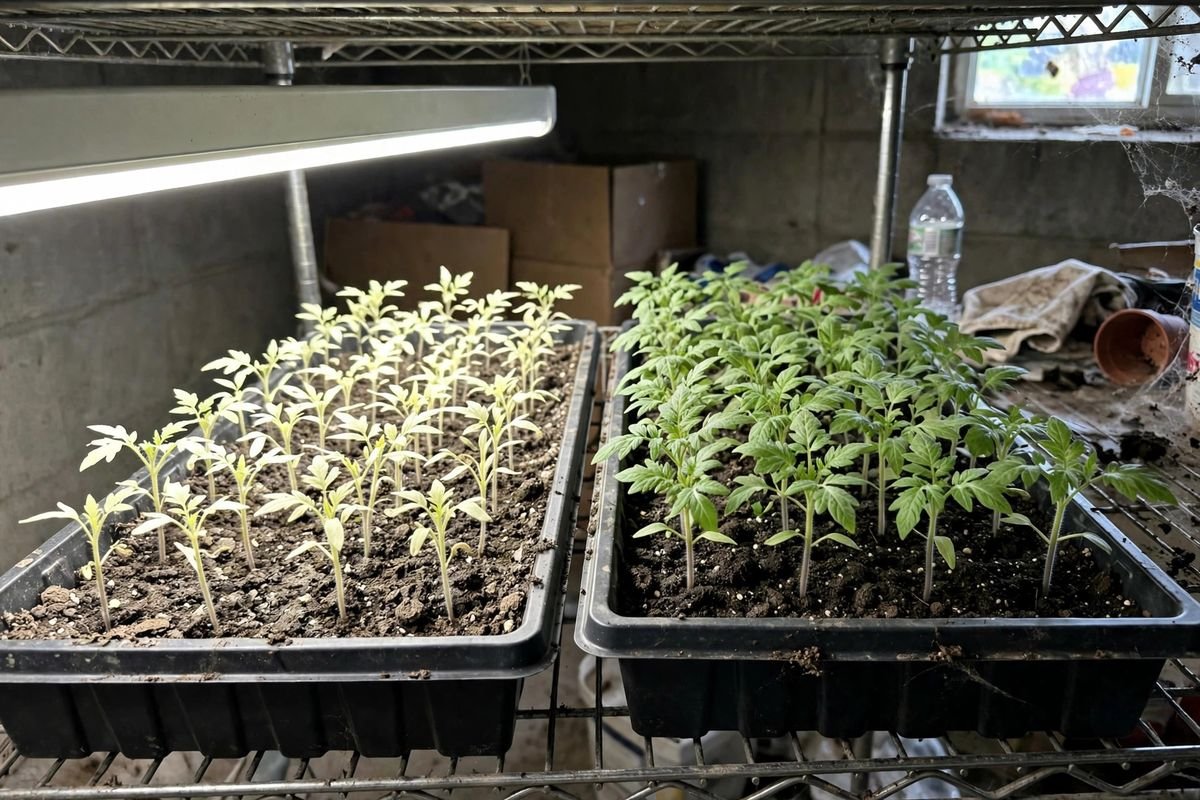
In the close tray, the top leaves turn pale first. The green fades to a washed-out yellow-white on the leaves nearest the light, while the lower leaves stay green. In the far tray, the leaves stay a steady green from top to bottom. If only the top leaves look pale, the light is the likely cause, since heat and light hit the top of the plant first.
Leaf curl follows the pale patches. The edges of the top leaves roll upward or inward, and the leaf surface feels dry and papery. A seedling that curls and pales at the top while the stem stays short is getting too much light. A seedling that stretches tall and thin with wide gaps between leaves is getting too little light, which is the opposite problem. For that one, see our guide on why seedlings go leggy under grow lights.
Signs of light burn
Light burn has four signs, and they tend to arrive in order. Learn the order, and you can act on the first sign instead of the last.
First, the top leaves lose color. The green turns pale yellow or white in patches, most often on the leaves closest to the light. The veins may stay green while the leaf surface between them fades, which gives the leaf a bleached look.
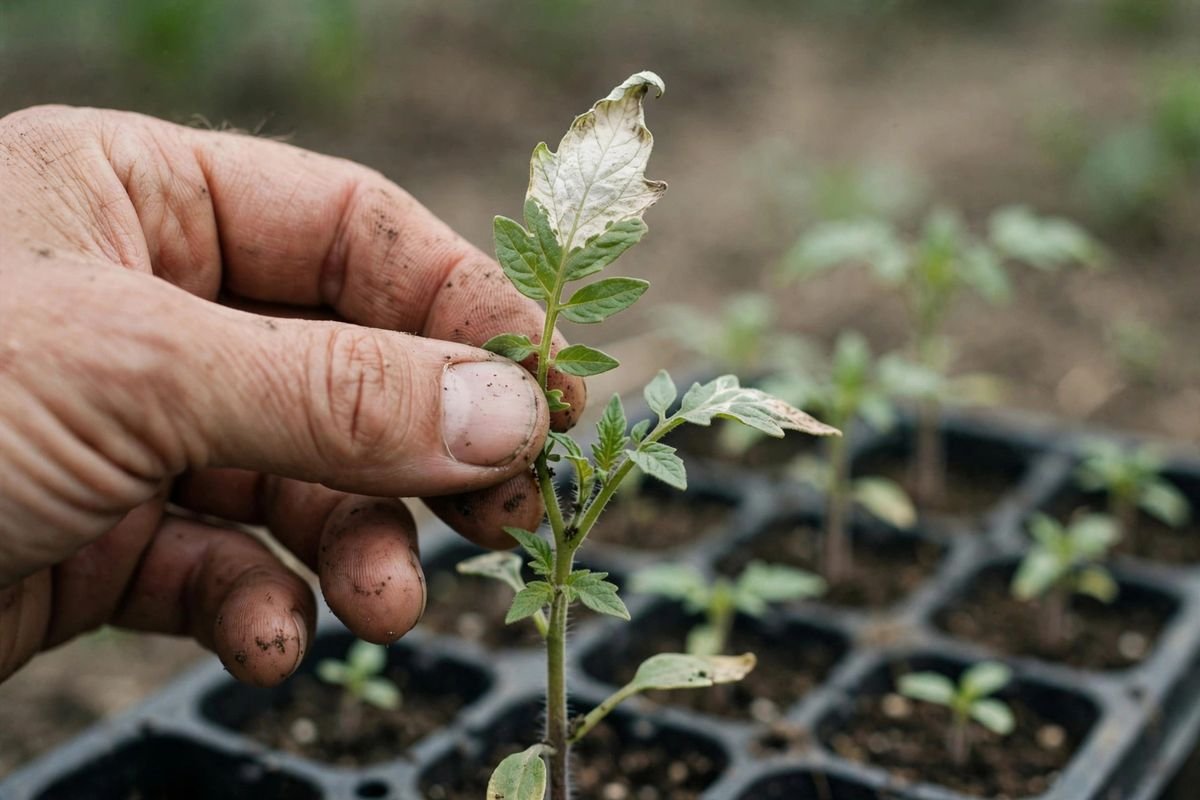
Second, the leaf edges curl. The edges roll up or fold inward, and the leaf may feel crisp at the rim. Curling is the plant cutting down the leaf area that faces the light, and it often shows up a day after the pale patches.
Third, the leaf tips turn brown and dry. Brown, papery tips on the top leaves mean the tissue has died back. Those brown parts will not turn green again, even after you fix the light.
Fourth, growth stalls. New leaves come in smaller than the ones below them, or the plant stops making new leaves at all for a few days. A stalled seedling that also shows pale, curled top leaves is almost certainly suffering from too much light, not from a lack of water or food.
Check the heat too. Hold the back of your hand at the top of the seedlings, just under the light, for 30 seconds. If the spot feels uncomfortably warm on your skin, it is too warm for the leaves. Heat and light work together here: a hot light burns faster than a cool one at the same height.
Our worked example: two trays, two heights
Here is a worked example with two trays of the same tomato seedlings, both under the same LED bar, both watered the same way, both on the same 16-hour schedule. The only difference is the hanging height. Tray A hangs 6 inches under the light. Tray B hangs 14 inches under the light. The heights below are guidance from extension sources, not readings from a lab meter, and your own fixture may call for a different height, so treat the numbers as a starting point.
| Day | Tray A: 6 inches | Tray B: 14 inches |
|---|---|---|
| Day 1 to 2 | Top leaves curl at the edges, stems look fine | Leaves stay flat and green |
| Day 3 to 4 | Pale white patches appear on the top leaves | New leaves come in green and full size |
| Day 5 to 7 | Leaf tips turn brown, new growth stalls | Plants grow steady, stems stay short |
The timeline matters. Curl shows up first, and it is easy to miss if you only glance at the shelf. Pale patches follow a day or two later, and by the time the tips turn brown, the plant has lost a week of growth. Check the top leaves every day for the first week under a new light, and act on the curl, not the brown tips.
The table below gives starting heights by light type. Fluorescent tubes run cool, so they can hang close. LED bars and panels run brighter, so they need more room. These are starting points from extension guidance: Iowa State University Extension puts fluorescent lights 4 to 6 inches above seedlings, and the University of New Hampshire Extension advises about 6 inches for shop lights, with the lights raised as the plants grow.
| Hanging height | Suits | What to watch for |
|---|---|---|
| 6 inches | Fluorescent tubes, low-output LED bars | Top leaves for curl in the first 2 days |
| 12 inches | Most LED bars and panels at full power | Pale patches on the top leaves by day 3 or 4 |
| 18 inches | High-output LED panels, warm rooms | Stretching stems, which mean the light is now too far |
Start at the height in the table for your light type, then watch the plants for a week. If the top leaves stay green and flat, the height is right. If they curl or pale, raise the light 2 inches and watch for three more days. Move in small steps, and let the leaves tell you when to stop.
Raising the light fixes most cases
Raising the light is the first fix, and it works for most cases. Lift the fixture 2 to 4 inches, or turn the dimmer down if your light has one, and the pale patches should stop spreading within a few days. New leaves should come in green and full size. The damaged leaves will not heal, but the plant grows past them.
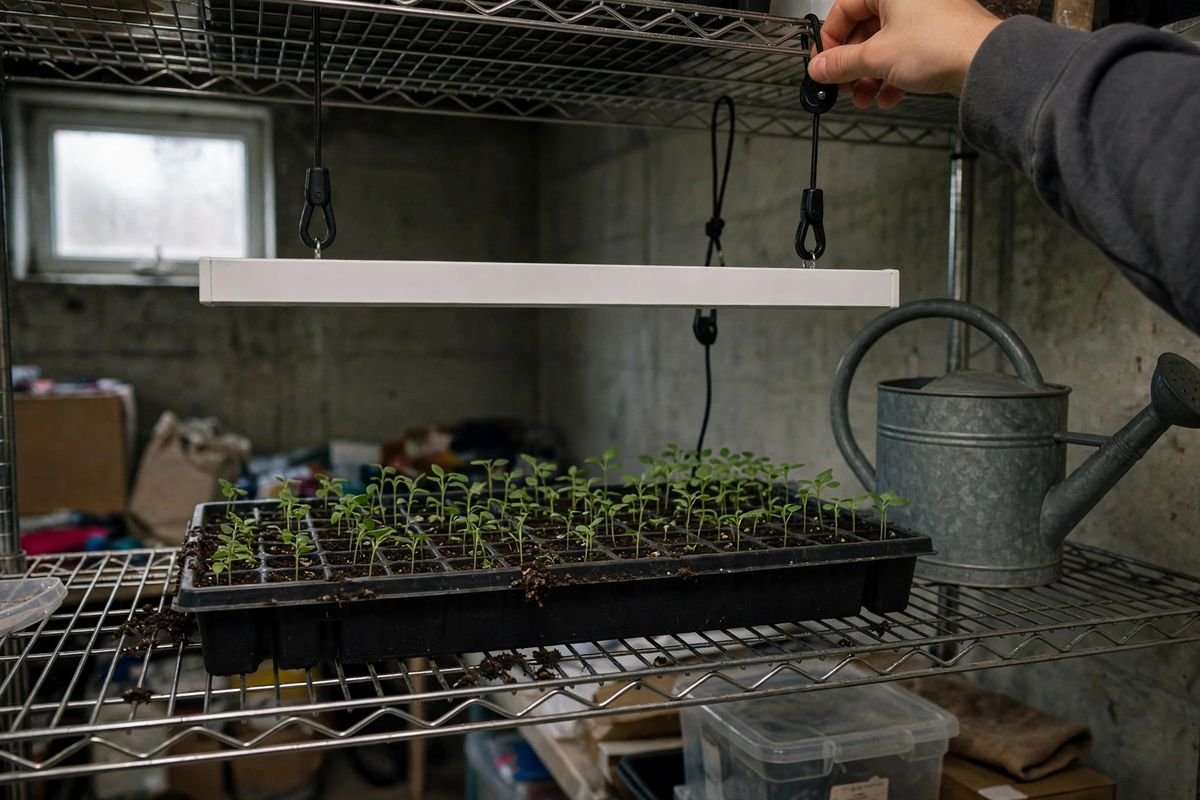
Adjustable cords or chains make this easy. Hang the light from cords that you can shorten or lengthen in seconds, and raise the light a little each week as the seedlings grow. A light that stays at one height while the plants grow taller will end up too close by the second week, even if the starting height was right. Check the gap every time you water.
If your light has a dimmer, you have a second option. Hang the light at the height in the table, then set the dimmer to about 75 percent for the first week. Turn it up a little each week as the plants grow stronger. A dimmer lets you keep the light close without pouring full power onto young leaves.
Do not move the light far away in one jump. A light raised from 6 inches to 24 inches in one move can leave the seedlings short of light, and they will stretch toward the fixture. Small moves of 2 to 4 inches, with a few days of watching between moves, give you the height that suits your plants without swinging from too close to too far. You can browse adjustable grow light hangers on Amazon if your current setup has no easy way to raise or lower the fixture. For the full rundown on hanging heights, see our guide on how high grow lights should be above seedlings.
What burned leaves can and cannot do
Burned leaves do not recover. A leaf with white patches or brown, papery tips will keep those marks, and it will not turn green again. Leave the damaged leaves on the plant, since they still feed it a little, and the plant will shed them on its own as new leaves take over.
What matters is the new growth. If the new leaves come in green and full size after you raise the light, the plant has recovered, and it will catch up in a week or two. If the new leaves also come in pale and small, the light is still too close, or the plant has another problem, such as dry soil or a nutrient gap. Raise the light again and check the watering before you look for a third cause.
Severely burned seedlings may need more time. A plant that lost most of its top leaves will grow slowly for a week while it makes new ones. Keep the light at the new height, water as usual, and do not feed extra fertilizer to push growth. Extra fertilizer on a stressed plant can burn the roots, which adds a second problem to the first.
If a seedling has no green leaves left at all, it is unlikely to recover, and starting a fresh seed is faster than nursing it back. Sow a new seed, hang the light at the right height from the start, and the new plant will pass the old one within two weeks.
Troubleshooting
Only one side of the tray looks burned
One-sided damage points to a light that hangs off-center or tilts. The close side gets too much light while the far side gets too little. Level the fixture, center it over the tray, and turn the tray a quarter turn every few days.
The leaves pale but the light feels cool
Light burn does not need heat. A bright LED panel can bleach leaves without warming them much, since the damage comes from too much light as well as from heat. Raise the light or turn down the dimmer, even if the fixture feels cool to the touch.
The seedlings look fine under a window but burn under the light
A sunny window gives strong light for part of the day, while a grow light gives steady light for 16 hours. The total daily light under the fixture is higher, so a seedling that thrives on a windowsill can still burn under a light hung too close. Raise the fixture and shorten the schedule by an hour or two if the pale patches persist. Our comparison of LED grow lights versus a sunny window covers the trade-offs between the two.
Brown tips appear after watering
Brown tips that show up right after watering may come from fertilizer salts, not from the light. If the top leaves look fine and only the oldest leaf tips brown after feeding, cut the fertilizer strength in half and water with plain water for the next two rounds.
Frequently asked questions
Can grow lights burn seedlings?
Yes. A light hung too close can bleach the top leaves white, curl the edges, and stall growth. The damage shows up within a few days, and raising the light or turning down the dimmer stops it from spreading.
How far should the light be from seedlings?
It depends on the light. Fluorescent tubes can hang 4 to 6 inches above the seedlings, while LED bars and panels usually need 12 inches or more. Start with the height in the table above for your light type, then adjust by watching the top leaves for a week.
Will burned seedlings recover?
Most will. The burned leaves keep their marks, but new leaves should come in green once you raise the light. If the new growth also comes in pale and small, the light is still too close, or the plant has another problem.
Is it better to dim the light or raise it?
Both work. Raising the light is the simplest fix when your fixture hangs from cords or chains. Dimming keeps the height steady and cuts the power instead, which suits a fixed shelf where the light cannot move. Use whichever your setup allows, and change one thing at a time so you know what fixed it.
Sources and further reading
- Iowa State University Extension, Getting a Head Start: How to Successfully Start Seeds Indoors
- UMass Extension, Starting Seeds Indoors: Caring for Your Seedlings
- University of New Hampshire Extension, Starting Plants From Seed
Related reading: How High Should Grow Lights Be Above Seedlings?, Why Seedlings Go Leggy Under Grow Lights, LED Grow Light vs Sunny Window