

This post may contain affiliate links. If you buy through links on this page, we may earn a commission at no extra cost to you.
As an Amazon Associate I earn from qualifying purchases.
A 4-by-4-foot growing area gives you two ways to fill it with light: one large panel hung in the center, or four slim bars spread across the space. The panel is simple to hang and strong in the middle. The bars take more wiring and spread the light more evenly to the edges. Both can raise good seedlings, and the right pick depends on what you grow and how even you need the light to be.
We have not tested either setup in our own garden, and this article makes no claim that we did. The numbers below are worked from stated assumptions about wattage and area, plus extension guidance on distance and hours. No light readings were measured for this piece. For the panel-versus-bar question in its simplest form, see our guide on the grow light panel vs grow light bar.
Side by side: one panel vs four bars
| Feature | One 200-watt panel | Four 40-watt bars |
|---|---|---|
| Total watts | 200 watts | 160 watts |
| Watts per square foot | 12.5 over 16 square feet | 10 over 16 square feet |
| Light in the center | Strong, often the brightest spot | Even, close to the edge level |
| Light at the edges | Weaker, with a clear falloff | Close to the center level |
| Fixtures to hang | One, with one cord | Four, with four cords or one shared cord |
| Adjusting height | One cord to pull | Four bars to move, or one frame to lift |
| Dimmer | Often built in | Sometimes built in, sometimes not |
| Best for | One crop that likes strong central light | Several trays that need even light edge to edge |
The table assumes a 4-by-4-foot area, which is 16 square feet, and the wattages stated in the worked example below. A panel or a bar with different wattage changes the watts per square foot, so check the label on the model you buy.
One panel: simple and strong in the middle
One panel hangs from a single cord or a pair of cords, plugs into one outlet, and lights the whole area from the center. Setup takes minutes: hang it, plug it in, set the timer. The light is strongest right under the panel, which suits a single tray of light-hungry seedlings in the middle of the space.
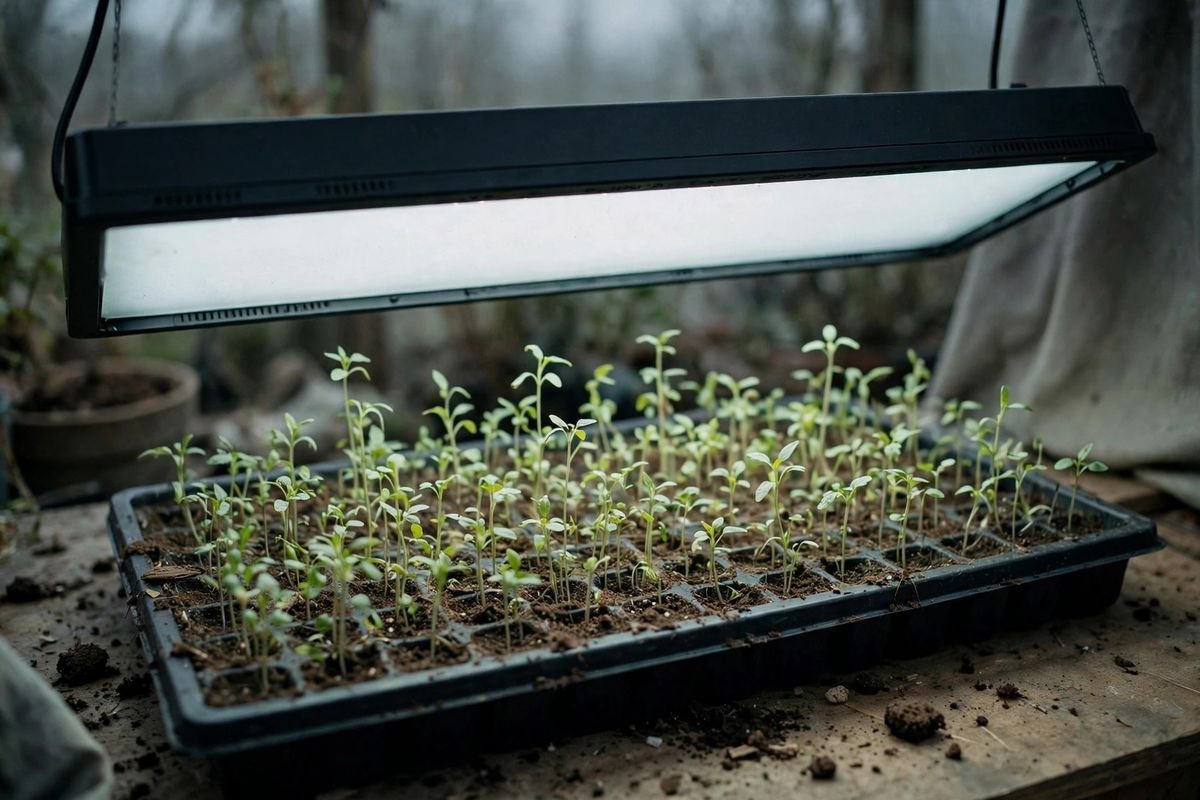
The panel wins on simplicity. One fixture means one cord, one plug, and one height to adjust. A built-in dimmer on many panels lets you soften the light for fresh sprouts without moving anything. For a grower with one crop and one area, that is the whole job done with the least fuss.
The weak spot is the edge. Light from a single point source falls off as you move away from the center, so seedlings at the corners get less light than seedlings in the middle. The middle grows stocky and the edges stretch, and the tray looks uneven even when the gap and the hours are right. If you use the full 4-by-4 area, the edge problem is the price of the simple setup. For the wider seedling light question, see our guide to the best grow lights for seedlings.
You can browse LED grow light panels on Amazon to compare the wattages and footprints on current listings.
Four bars: even light edge to edge
Four bars spread across the same area, one over each strip of the space, give each tray nearly the same light. Each bar lights its own strip, and the strips overlap a little at the joins, so no corner sits far from a light source. Trays grow at the same pace across the whole area, which matters when you sow four trays on the same day and want them ready on the same day.
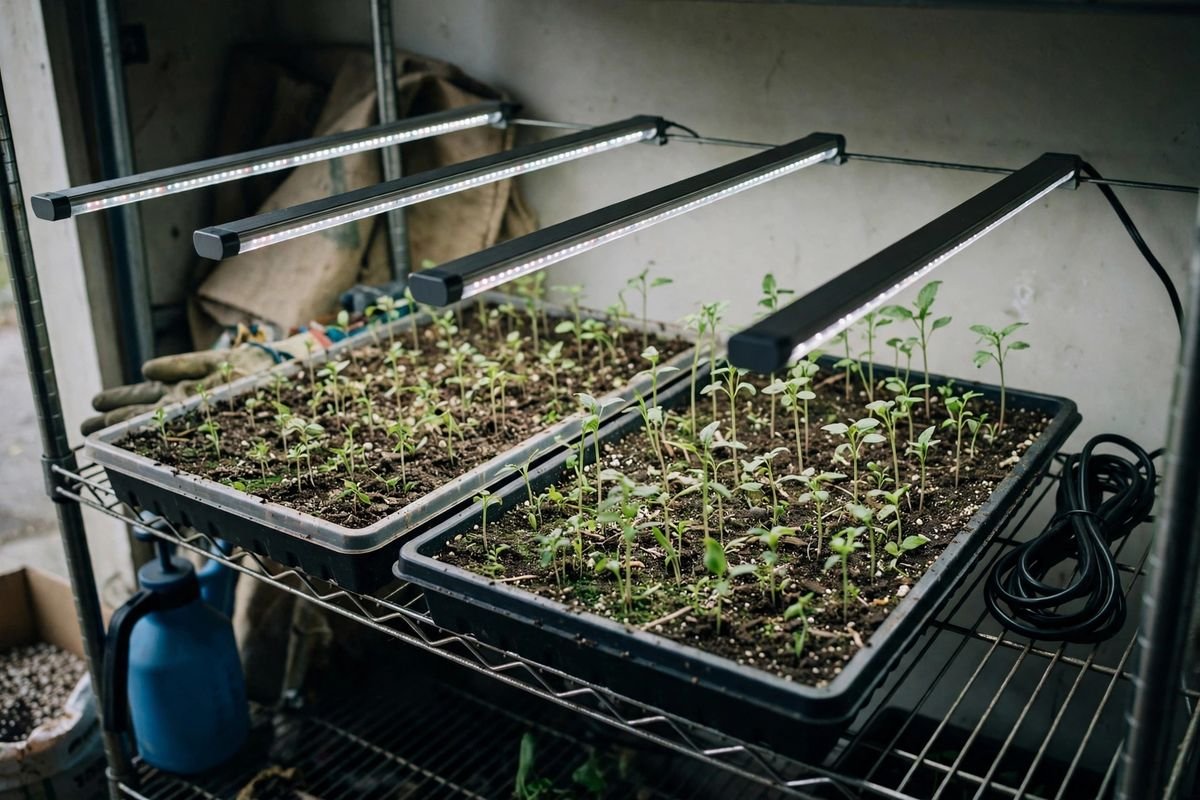
Bars suit a grower who fills the whole area. Four trays of mixed crops, such as tomatoes, peppers, lettuce, and herbs, each sit under their own bar, and each bar can sit at the gap its crop needs. A bar over lettuce can hang a little higher than a bar over tomatoes, and no crop waits on the others.
The cost is wiring and adjustment. Four bars mean four mounts, and raising the light means moving four bars or lifting a frame that holds all four. Daisy-chain cords help, since one plug can feed several bars in a row, and a simple wooden or metal frame can hold all four bars at one height. For the bar-versus-bulb version of this choice, see our guide on grow light bars vs bulbs.
Our worked example: watts per square foot over 16 square feet
Here is the watts-per-square-foot math for a 4-by-4-foot growing area, which is 16 square feet. We state every assumption so you can redo the math with your own numbers, and we claim no measured light readings.
Assumptions: one panel draws 200 watts, and each of the four bars draws 40 watts, which is 160 watts in total. Both setups run 14 hours a day. The panel hangs centered over the area, and the bars sit spaced evenly, one over each 1-foot strip of the 4-foot width. Coverage is assumed even for the bars and center-weighted for the panel, with edge falloff on the panel that we do not put a number on, because we did not measure it.
Watts per square foot is total watts split by 16 square feet. The panel gives 200 divided by 16, which is 12.5 watts per square foot. The four bars give 160 divided by 16, which is 10 watts per square foot. The panel puts about 25 percent more watts on each square foot on paper, and it puts more of those watts in the center than at the edges.
Electricity per season, at 14 hours a day for 10 weeks, which is 980 hours, and $0.15 per kilowatt-hour: the panel uses 200 watts times 980 hours, which is 196 kilowatt-hours, times $0.15, which is $29.40 per season. The four bars use 160 watts times 980 hours, which is 156.8 kilowatt-hours, times $0.15, which is $23.52 per season. The bars save $5.88 per season on electricity in this example, and the panel spends more to light the same area.
The gap that matters is not the watts on paper but the light at the leaf. University of Minnesota Extension puts seedlings 4 to 6 inches from the light, and that gap applies to both setups. A panel at 5 inches over the center tray and a bar at 5 inches over its strip give their plants the same close light. The difference shows up at the edges, where the panel leaves plants farther from a light source and the bars keep every plant near one.
The edge problem
The edge problem is easy to spot and easy to miss until the plants show it. Seedlings at the edge of a tray grow paler and taller than the seedlings in the center, with longer stems and thinner leaves. The center plants look stocky, the edge plants look stretched, and the tray reads as two different crops.

Under one panel, the fix is to shrink the growing area or move the trays. Put one tray in the center, where the light is strongest, and leave the corners empty or fill them with a crop that tolerates less light. Turn the tray every day so each side takes a turn near the center, and raise or lower the panel so the gap stays at 4 to 6 inches for the tallest plants.
Under four bars, the edge problem is smaller, and the fix is spacing. Keep the bars evenly spaced, about 1 foot apart across the 4-foot width, and check that no bar has slipped toward its neighbor. A bar that drifts leaves a dim strip, and the seedlings under that strip stretch just like edge plants under a panel.
Either way, watch the plants, not the wattage. Pale, stretched growth means the light is too far or too weak where that plant sits. Stocky growth with short stems means the gap and the hours are right. For the hours side of this, see our guide on how long grow lights should stay on for seedlings.
One panel: pros and cons
Pros
- One fixture to hang, one cord, one plug, and one height to adjust.
- Strong light in the center, which suits one tray of light-hungry seedlings.
- Dimmer built in on many models, for soft light on fresh sprouts.
- Fast setup, with no frame to build and no bars to space.
- Higher watts per square foot on paper, 12.5 in our worked example.
Cons
- Light falls off at the edges, so corner seedlings stretch and pale.
- Uses more electricity, $29.40 per season in our example against $23.52 for the bars.
- One height fits all, so mixed crops share a gap that suits none of them well.
- A single failure takes out the light for the whole area.
- Wasted light where the area sits empty, since the panel lights the full footprint at once.
Four bars: pros and cons
Pros
- Even light edge to edge, with each tray near its own bar.
- Lower total watts, 160 against 200, and lower electricity per season.
- Each bar can sit at the gap its own crop needs.
- One bar failing leaves three bars still running.
- Easy to add or remove a bar as the growing area changes size.
Cons
- Four fixtures to hang, wire, and adjust, which takes more time.
- Lower watts per square foot on paper, 10 in our worked example.
- Bars can drift out of spacing and leave a dim strip.
- More cords to keep tidy, even with daisy-chain wiring.
- Dimmer often missing on budget bars, so brightness changes by moving the bar.
Our verdict: choose the setup that fits your trays
Choose one powerful panel if you grow one crop in one area, you want the fastest setup, and you can keep the trays near the center where the light is strongest. The panel is simple, and the edge problem stays small when the growing area stays small.
Choose multiple light bars if you fill the whole 4-by-4 area, you sow several trays on the same day, and you want them ready on the same day. The bars spread the light evenly, each crop gets its own gap, and the electricity runs a little cheaper per season.
Either setup fails when the gap drifts past 6 inches or the timer slips. Check the gap at every watering, keep the bars evenly spaced or the panel centered, and let the timer hold 16 to 18 hours a day.
Troubleshooting
Center plants grow fast, edge plants stretch
The panel lights the center more than the edges. Move the trays toward the center, shrink the growing area, or turn the tray daily. Under bars, check the spacing and push any drifted bar back to its even slot.
One tray lags behind the rest
That tray sits under a dim spot. Check that its bar runs, that the bar is clean, and that the gap is 4 to 6 inches. Swap the tray with a tray from a bright spot for a week and see whether the lag follows the tray or the spot.
Leaves look scorched under the panel
The panel is too close for the plants under it. Raise it a few inches and watch new growth for a week. Old scorched leaves do not heal, and new leaves tell you whether the new gap is right.
The bars hum or flicker
Check the plug and the daisy-chain joints first, then try a different outlet. A flicker that follows one bar points to that bar or its driver. A bar under warranty goes back to the seller, and you do not open the housing to fix it yourself.
Frequently asked questions
Is one big light better than several small lights?
It depends on the area. One big light is better for a single tray in the center, where its strength counts. Several small lights are better for a full area, where even light edge to edge counts more than strength in the middle.
How many watts per square foot do seedlings need?
Watts per square foot is a rough guide, not a rule. In our example, a panel gives 12.5 and four bars give 10, and both can raise seedlings when the gap is 4 to 6 inches and the hours run 16 to 18 a day. Judge growth by the plants, not by the watts.
Can I start with a panel and add bars later?
Yes. Hang the panel over the center trays, and add a bar over any tray that sits at the edge and stretches. The two can share a timer, and the bars fill the dim corners the panel leaves.
When should I move seedlings outside?
Move them out after your last frost date, once you have hardened them off for a week in shade and wind. Use your local frost dates and regional planting guidance — not your USDA hardiness zone alone — to choose planting dates.
Sources and further reading
- University of Minnesota Extension, Lighting for indoor plants and starting seeds
- Michigan State University Extension, Selecting and starting seeds indoors
- Michigan State University Extension, Growing seedlings under LEDs, part 1
Related reading: Grow Light Bars vs Bulbs, Grow Light Panel vs Grow Light Bar, Best Grow Lights for Seedlings, How Long Should Grow Lights Stay On for Seedlings