This post may contain affiliate links. If you buy through links on this page, we may earn a commission at no extra cost to you.
As an Amazon Associate I earn from qualifying purchases.
A seed packet costs a few dollars. A flat of nursery transplants can cost ten times that. Somewhere between those two numbers sits a seed-starting tray, and it’s the one purchase that decides whether your indoor seed starting feels easy or ends in soggy, leggy frustration.
We put this guide together from published extension guidance, tray specifications, and the feedback patterns gardeners repeat most often in reviews and forums. One honest note: we didn’t buy and stress-test every tray type ourselves, and we won’t pretend otherwise. What follows is a research-based comparison to help you buy the right tray the first time — not a test report.
And before anything else: use your local frost dates and regional planting guidance — not your USDA hardiness zone alone — to choose planting dates. Trays only help if seeds go in at the right time.
The six tray types, at a glance
| Tray type | Best for | Reusable? | Watch out for |
|---|---|---|---|
| Standard 1020 plastic cell trays | Almost everyone; the default choice | Yes (thick ones last years) | Cheap thin inserts crack fast |
| Peat pots | Crops that hate transplant shock | No (single use) | Dry out quickly; can mold in humid rooms |
| Coir pots | Same as peat, if you’d rather skip peat | No (single use) | Some pots break down too slowly in soil |
| Silicone trays | Gardeners who want easy pop-out seedlings | Yes, for many seasons | Higher price; smaller cells on some models |
| Soil blockers | Plastic-free starting, minimal root disturbance | Yes (the tool itself) | Needs a special chunky soil mix; learning curve |
| Self-watering trays | Busy or forgetful waterers | Yes | Costs more; reservoirs need cleaning |
1. Standard 1020 plastic cell trays: the default for a reason
The workhorse of indoor seed starting is the 1020 tray — roughly 10 by 20 inches — fitted with a cell insert. The insert divides the flat into individual cells, and the common counts are 72, 50, and 32 cells per tray. A 72-cell insert holds cells about an inch and a half across, good for starting many plants at once; a 32-cell insert gives each plant more soil volume and a longer runway before transplanting.
What matters most is plastic thickness. Thin, flimsy inserts are cheap because they’re disposable — they bow when you lift them, crack at the corners, and rarely survive a second season. Thick, heavy-duty trays cost more up front but shrug off years of filling, watering, and washing. If you plan to start seeds every year, the heavy-duty option is the better buy over time.
The other quiet advantage of 1020 trays is standardization: humidity domes, heat mats, and bottom-watering trays are all built to fit this footprint, so your accessories stay compatible as your setup grows.
Browse heavy-duty 1020 seed starting trays on Amazon
2. Peat pots: plant the pot, skip the transplant shock
Peat pots are biodegradable containers you fill like any other cell, then plant pot and all. Because you never pull the seedling out, roots stay undisturbed — the big selling point for crops that resent transplanting, like cucumbers, squash, and melons.
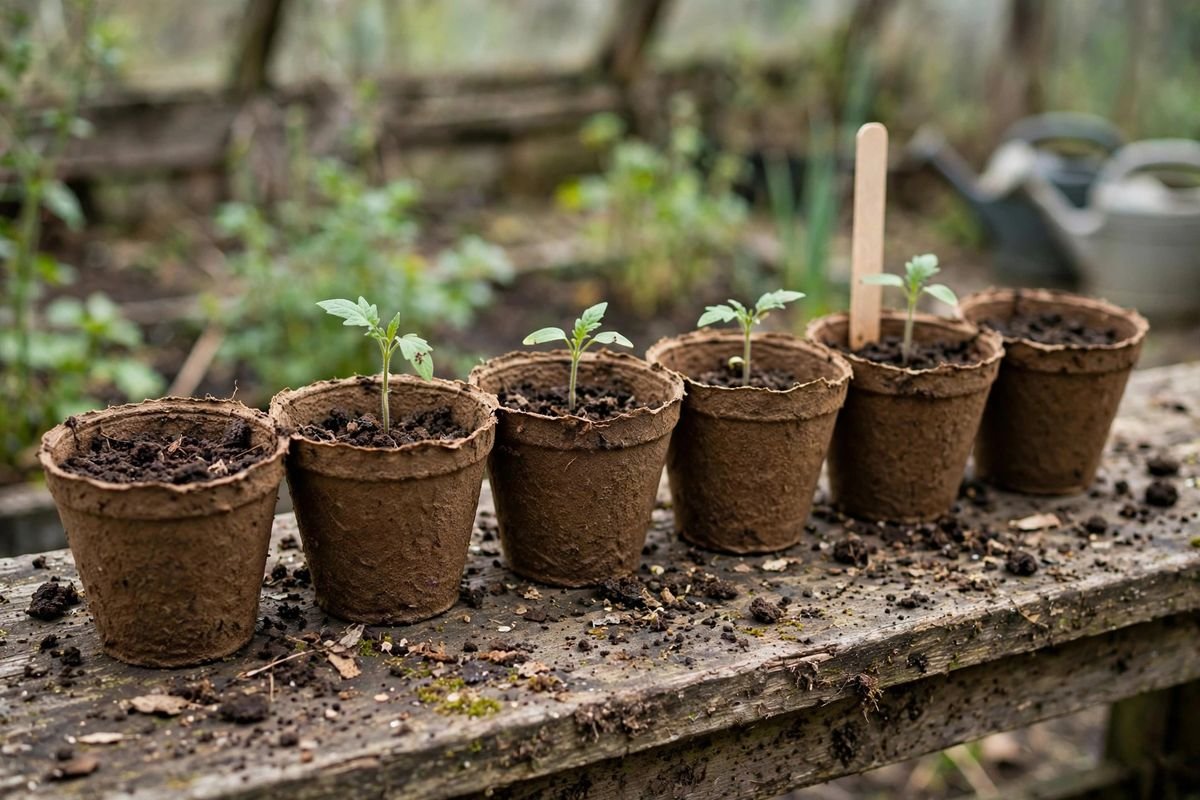
The trade-offs are real. Peat wicks moisture away fast, so pots dry out sooner than plastic cells and need closer watching. In still, humid indoor air they can grow mold on the outside — usually harmless, but worth knowing. And any rim of pot left above the soil line acts like a wick, pulling water away from the root ball; bury the rim below the surface at planting time.
Peat is also a finite resource: bogs regenerate over centuries, not seasons. If that bothers you, coir pots below scratch the same itch.
Browse biodegradable peat pots on Amazon
3. Coir pots: the renewable stand-in for peat
Coir pots are made from coconut-husk fiber, a byproduct of the coconut industry. They work exactly like peat pots — fill, sow, plant the whole thing — and many gardeners report they hold their shape a bit longer in the tray. For anyone trying to reduce peat use, coir is the closest drop-in substitute.
Two things to check before buying. Some coir pots are wrapped in a thin mesh net (the pellet-style ones especially), and gardener feedback suggests roots can struggle to push through it — snipping or peeling the net off at transplant time avoids the problem. And because coir itself contains no nutrients, you’ll still want to feed seedlings once true leaves appear, the same as with any soilless setup.
Browse coir seed starting pots on Amazon
4. Silicone trays: the reusable pop-out option
Silicone cell trays borrow the muffin-pan idea: flexible cells you can push from underneath to pop seedlings out cleanly. For anyone who has ever mangled a root ball trying to pry it from rigid plastic, that flexibility is genuinely appealing. Silicone is also food-grade, easy to wash, and survives many seasons without cracking.
The catch is cost — silicone trays run noticeably more than plastic — and some models have smaller cells than a 72-count insert, so check cell dimensions against what you plan to grow. They’re a good fit for gardeners who start modest numbers of plants and want one tray purchase to last a decade.
Browse silicone seed starting trays on Amazon
5. Soil blockers: no tray at all
A soil blocker is a metal tool that compresses damp seed-starting mix into free-standing cubes — no cells, no plastic, no pot. Roots reach the edge of the cube and stop (“air pruning”), which means no circling and, in theory, less transplant shock than in any container.
The blocker itself lasts indefinitely, which is the appeal, but there is a learning curve. Standard seed-starting mix won’t hold together — you need a chunkier, stickier blend (often with extra peat or compost and sometimes a bit of garden soil), and the mix has to be wetter than you’d expect. Once the technique clicks, blockers are one of the lowest-waste ways to start seeds indoors.
Browse soil blockers on Amazon
6. Self-watering trays: a reservoir does the remembering
Self-watering trays pair a standard insert with a water reservoir underneath, so moisture wicks up into the cells by capillary action instead of coming from a watering can above. Gardeners who travel or simply forget to water tend to love them — and extension guidance consistently favors bottom watering for seedlings, since dry leaf surfaces mean less damping-off disease.
The downsides: they’re the priciest category here, and reservoirs need periodic cleaning to prevent algae and mineral buildup. If you’re home every day and happy to bottom-water a plain tray by hand, you may not need one. If your seedlings have ever died of neglect, the reservoir can pay for itself in the first season.
Browse self-watering seed starting trays on Amazon
What actually matters when you buy a tray
Beyond the type, five features separate good trays from frustrating ones:
- Cell size and depth. Bigger cells hold more soil, which means more water, more nutrients, and more time before transplanting. Deep cells matter for tap-rooted and fast-growing plants like tomatoes and peppers. (More on this below.)
- Drainage. Every cell needs a way for excess water to escape. Seedlings sitting in waterlogged mix are prime targets for damping-off, the fungal disease that topples seedlings at the soil line. Flip a tray over before buying — the drainage holes should be open and generously sized.
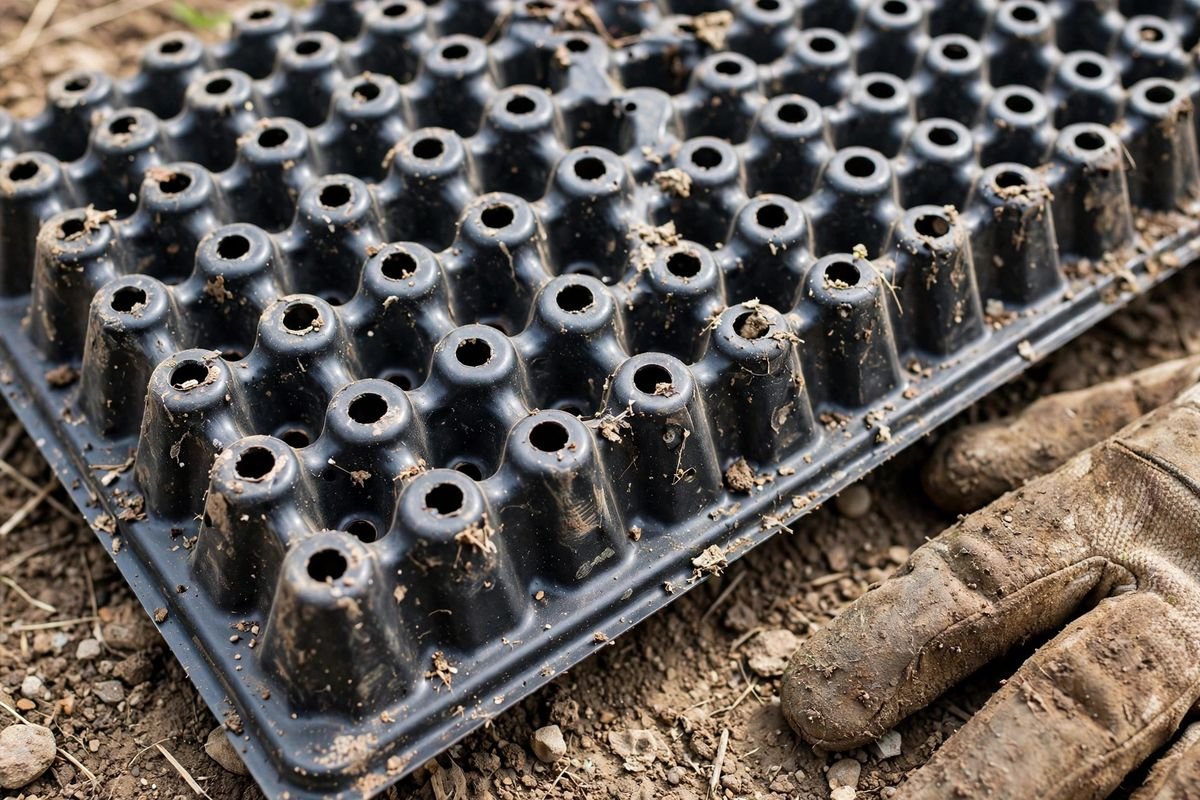
- Material thickness. Flex a tray in the store (or check review photos for cracks). If it bends like a potato chip, it won’t survive many seasons.
- Humidity-dome fit. Standard 1020 trays accept standard domes, but some thick-walled trays don’t seat quite right under every dome. If you plan to use one, confirm the fit.
- Cell pop-out ease. Tapered cells release root balls more cleanly than straight-sided ones. Silicone and soil blocks solve this entirely; rigid plastic varies.
Cell size and depth, demystified
Here’s the rule of thumb most experienced growers follow: match the cell to how long the seedling will stay in the tray and how big it gets. Tiny cells (72-count and smaller) work for lettuce, herbs, and flowers that move out fast. Tomatoes, peppers, and eggplants do better in 50-cell or larger inserts where they can build real root systems.
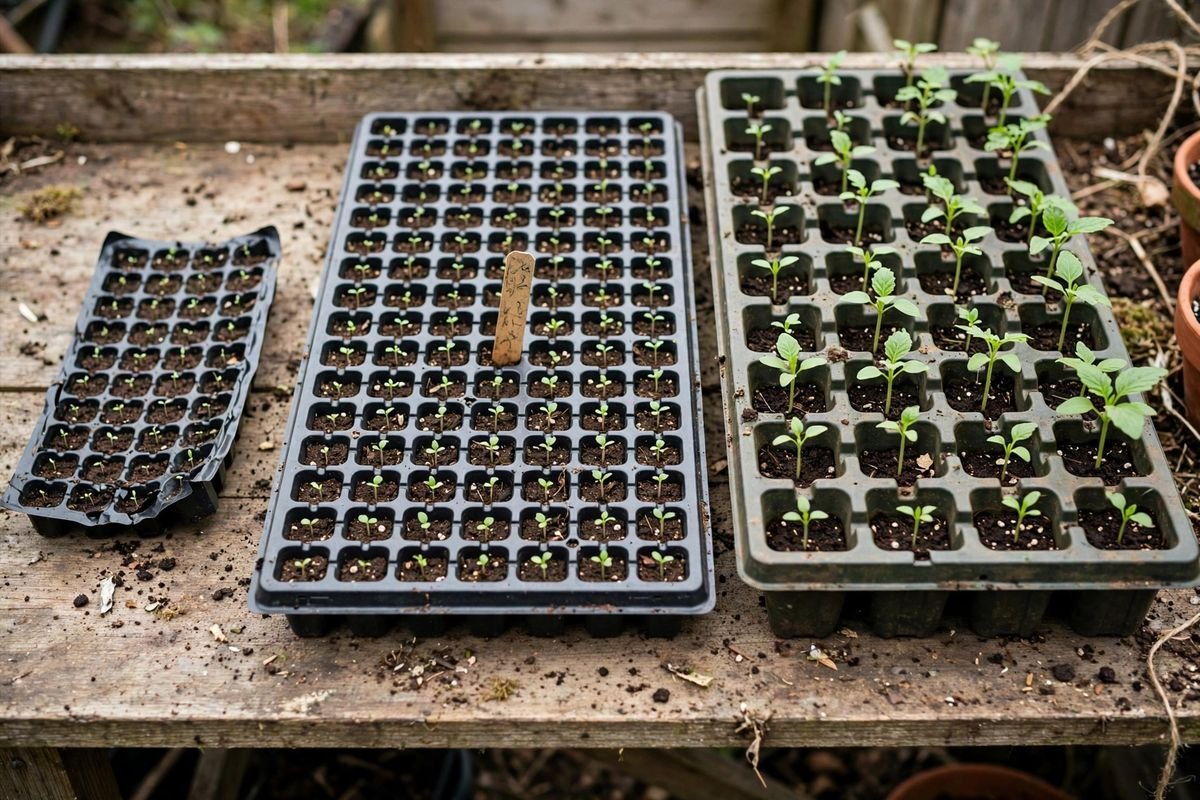
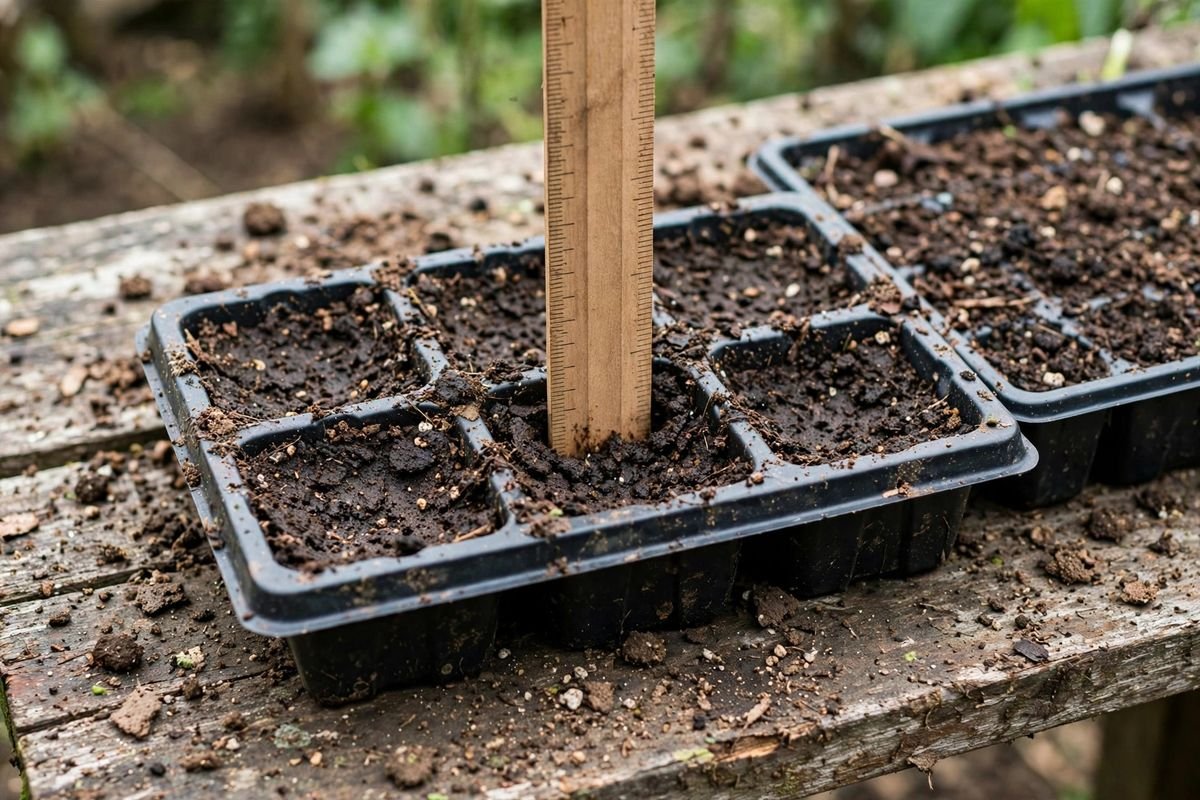
Depth matters as much as width. A shallow cell dries out faster and constrains roots sooner. When in doubt, go one cell size larger than you think you need — over-potted seedlings are a rare problem in seed starting, while root-bound ones are common.
Starting tomatoes? Our guide to growing tomatoes from seed walks through timing, potting up, and transplanting. And if you’re brand new to the whole process, the beginner’s guide to starting a vegetable garden covers the full first season.
Transplanting out of a tray without wrecking roots
However good your tray is, the transplant is where seedlings live or die. Water the cells an hour or two before you plan to move them — moist mix holds together. Push from underneath rather than pulling the stem, and handle seedlings by their leaves, never the stem. A crushed stem doesn’t recover; a nicked leaf does.
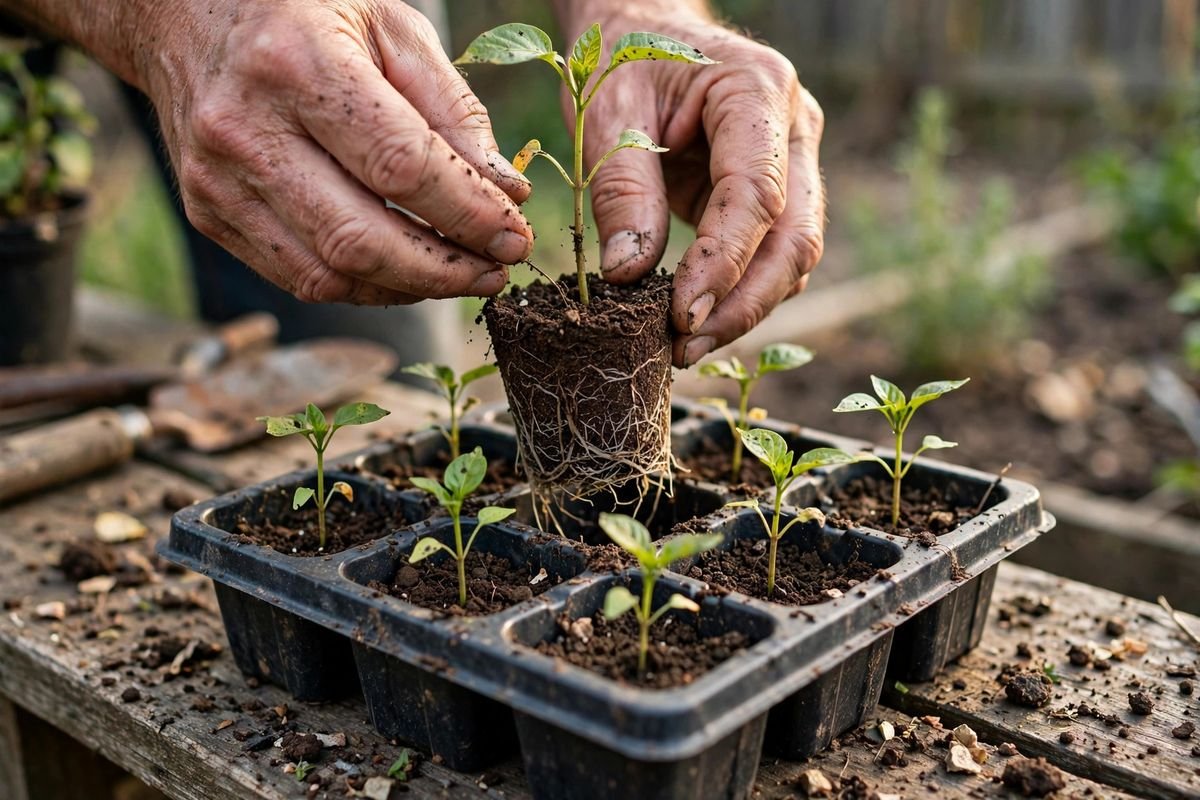
If roots are circling the bottom of the cell, the seedling sat too long — transplant anyway, tease the roots gently, and start earlier next time. For crops you’re unsure about, our list of the easiest vegetables for beginners leans toward forgiving choices that tolerate beginner mistakes.
Common seed tray problems (and fixes)
My thin tray cracked mid-season
This is the classic cheap-insert failure. For the rest of this season, nest the cracked insert inside a solid tray or a baking sheet so you can still bottom-water. Next year, buy the thick version once instead of the thin one twice.
Peat pots dried out and the seedlings wilted
Peat wicks moisture aggressively. Group the pots together in a solid tray with a little water in the bottom so they wick from below, and check moisture daily — twice daily in warm rooms. Tear off any pot rim sticking above the soil line; it acts as a wick in the wrong direction.
There’s white mold or green algae on the soil
Surface mold on peat pots is usually harmless and fades once the seedlings go outside. Algae on the soil surface signals too much water and too little airflow. Let the surface dry between waterings, bottom-water instead of misting, and give the tray some air circulation — a small fan on low nearby works wonders.
My seedlings toppled over at the soil line
That’s damping-off, a group of fungal diseases that thrive in cool, wet, still conditions. There’s no cure once it hits a seedling, so prevention is everything: fresh seed-starting mix (not garden soil), drainage that actually drains, and humidity domes removed right after germination. Mississippi State Extension’s seed-starting guide makes exactly this point — domes off as soon as seeds sprout.
FAQs about seed starting trays
How many times can I reuse plastic seed trays?
Thin inserts often last one or two seasons before cracking. Thick, heavy-duty trays can last many years if you wash them between seasons — a diluted bleach soak (roughly 1 part bleach to 9 parts water) followed by a thorough rinse is the standard sanitizing routine gardeners use to knock back disease carryover.
Do I need a humidity dome?
Not strictly, but domes keep the mix from drying out during germination, which is when drying out is fatal. The critical part: remove the dome as soon as seedlings emerge. Leaving it on invites damping-off.
Can I just use egg cartons or yogurt cups?
You can, with drainage holes poked in the bottom. But repurposed containers are usually shallow and oddly sized, which means more frequent watering and root-bound seedlings sooner. A proper tray is one of the cheapest upgrades in seed starting — if you’re comparing options, our companion guide to seed starting kits for beginners bundles trays with domes and extras.
Are peat pots or plastic trays better for tomatoes?
Both work. Plastic cells (50-count or larger) give tomato roots more room and let you pot up easily; peat pots skip the transplant disturbance tomatoes dislike. Pick based on which weakness worries you more — drying out (peat’s risk) or root disturbance (plastic’s risk).
More seed-starting posts to explore
- Best Seed Starting Kits for Beginners — tray, dome, and extras bundled
- How to Grow Tomatoes from Seed
- Easiest Vegetables to Grow for Beginners
- How to Start a Vegetable Garden
Sources & Further Reading
- Mississippi State University Extension: tips for germinating seeds at home (heat mat thermostat settings, dome removal after germination, damping-off)
- University of Wisconsin Extension: soil temperature minimums and optimums for vegetable seed germination
- Ohio State University Extension (BYGL): soil temperature as a planting guide
Are you starting seeds indoors this year? Tell us which tray type you’re leaning toward in the comments — and what you plan to grow first.