
This post may contain affiliate links. If you buy through links on this page, we may earn a commission at no extra cost to you.
As an Amazon Associate I earn from qualifying purchases.
Mushrooms are the one crop you can grow in a dark corner of the kitchen in January. A ready-to-fruit oyster mushroom kit needs no garden, no soil, and no grow light. You cut a slit in the bag, mist it twice a day, and small mushroom pins appear within a week or two. The first harvest usually lands about two weeks after you open the kit.
This guide walks through choosing a kit, setting it up, misting, and harvesting, with a worked example that shows the yield and the cost per pound for one kit. Oyster mushrooms are the best first mushroom, and the guide explains why before it gets into the steps.
Why oyster mushrooms are the best first mushroom
Oyster mushrooms grow fast, forgive small mistakes, and fruit across a wide range of indoor temperatures. Cornell Small Farms lists oyster mushrooms among the easiest mushrooms to grow at home, alongside shiitake and wine cap, and notes that oysters grow on the widest range of materials. For a first grow, that forgiveness matters more than anything else.
Blue and grey oyster strains fruit well between about 55 and 75 degrees, which is normal room temperature in most houses. They also grow fast enough that you see results in days, not months, which keeps the project fun. Lion’s mane and shiitake kits work indoors too, and they make a good second project once you have one oyster harvest behind you.
Skip morels, truffles, and chanterelles for indoor growing. Those mushrooms form partnerships with living tree roots, and they do not fruit from a kit the way oysters do. A kit that promises indoor morels is selling a hope, not a harvest.
What a grow kit is
A mushroom grow kit is a block of sawdust or straw substrate that is already fully colonized with mushroom mycelium, the white thread-like growth that becomes mushrooms. The block arrives in a plastic bag inside a cardboard box, ready to fruit. Your job is to give it the three things it needs: moisture, fresh air, and a little indirect light.
Most kits fruit two or three times, with a rest of about two weeks between flushes. The first flush is usually the biggest. After the last flush, the spent block goes into the compost or into a shady spot in the garden, where it may fruit once more outdoors.
Look for a kit from a seller that states the species and strain on the box, and check the date on the box before you buy. A kit that has sat in a warehouse for months may still fruit, and it may also be slower to start. You can browse oyster mushroom grow kits on Amazon to compare species and kit sizes.
Setting up the kit
Pick a spot with indirect light and steady room temperature, away from radiators and drafty windows. A kitchen counter near a window works well, as does a bathroom shelf. Direct sun dries the block out and can cook the pins, so keep the kit out of a sunny windowsill.
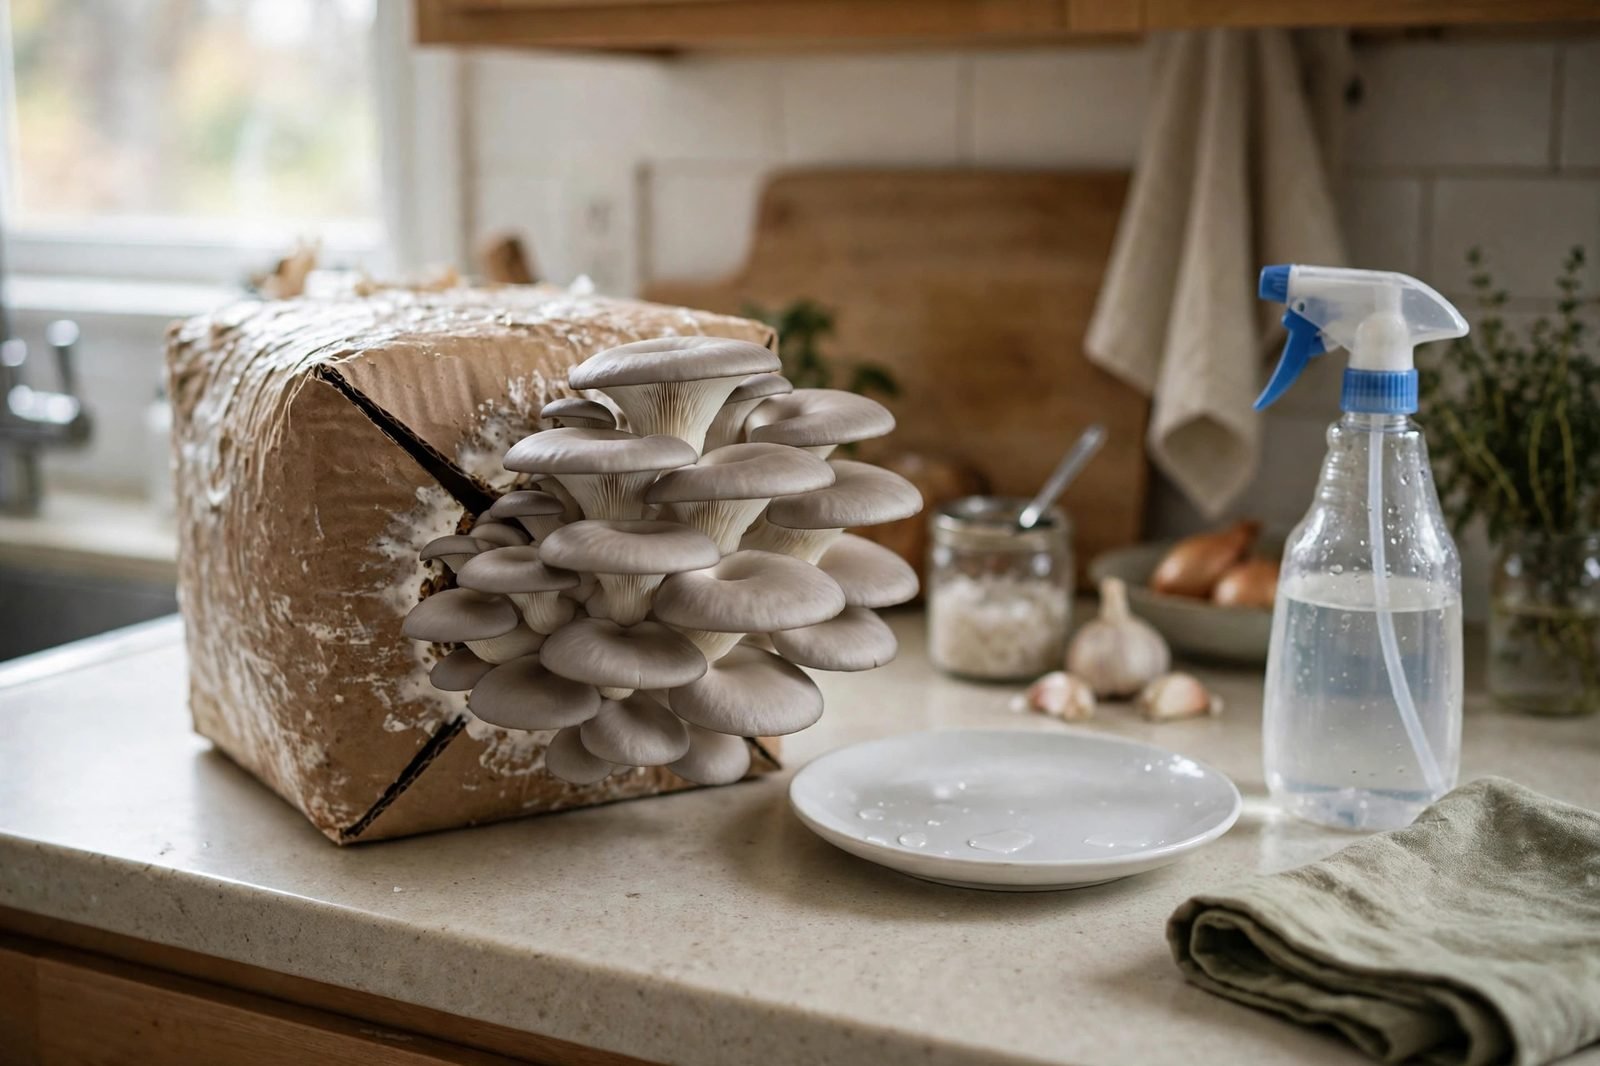
Open the box and cut an X or a slit in the plastic bag where the instructions say to cut, usually on one flat face of the block. A clean knife makes a neater cut than scissors, and a neat cut gives the mushrooms a clean place to push through. Set the block on a plate or a shallow tray to catch drips, and keep a spray bottle of plain water nearby.
Some kits come with a humidity tent, a clear plastic bag that fits loosely over the block. If yours does not, a large clear plastic bag with a few holes cut in it does the same job. The tent holds moisture around the block, and you lift it off for a few seconds several times a day to let fresh air in.
Misting and fresh air
Mushrooms are mostly water, and the block dries out fast in a heated house. Mist the cut area two or three times a day with plain water, enough that the surface looks damp but not dripping. A light misting morning and evening is the usual routine, with a third misting on dry days.

Fresh air matters as much as water. Oyster mushrooms are sensitive to carbon dioxide, and stale air gives you long thin stems with tiny caps. Lift the humidity tent and fan it gently for about thirty seconds a few times a day, or leave the tent open at the bottom so air moves through. A kitchen with normal foot traffic usually gives enough air movement on its own.
Light is the least demanding part of the setup. Indirect daylight from a nearby window is enough to tell the mushrooms which way is up, and a kitchen light left on in the evening does no harm. Do not put the kit under a grow light or in direct sun; both dry the block and can stall the pins.
What to expect: pins to harvest
Small white pins appear at the cut within about a week of opening the kit, sometimes sooner in a warm room. The pins look like tiny white bumps at first, then they push out into clusters of small caps. From pins to harvest takes about five to seven days, and the mushrooms grow fast in the last two days, so check the kit every morning.

Harvest when the caps are still slightly cupped under at the edges and before they flatten out and drop spores. A cluster harvested a day early tastes the same as one harvested on time, and a cluster left a day too long drops a fine white dust of spores over the counter. Cut the whole cluster off at the base with a clean knife, or twist it gently away from the block.
After harvest, rest the block for about two weeks. Mist it lightly once a day during the rest, keep it in the same spot, and watch for a second flush. The second flush is usually smaller than the first, and a third flush smaller still. When the block stops producing, it is done.
Our worked example: yield and cost per pound for one kit
Here is the planning math for a single oyster kit, so you can decide whether a kit is a treat or a bargain. We assume a kit price of $30, stated here as a planning assumption rather than a listing price, and a total yield of 1 to 2 pounds across 2 to 3 flushes, which is the usual range for a ready-to-fruit oyster kit.
At the middle of that range, 1.5 pounds from a $30 kit, the cost works out to $20 per pound. At the low end, 1 pound from a $30 kit, the cost is $30 per pound. At the high end, 2 pounds from a $30 kit, the cost is $15 per pound. Fresh oyster mushrooms at a grocery store often sell in the same range, so a kit usually costs about the same as buying the mushrooms, and the fun of growing them is the extra value.
The misting math is simpler. Two mists a day for 14 days before the first flush is 28 mists, and each misting takes about ten seconds. That is less than five minutes of work for the first harvest, plus a minute a day to check the pins. If the cost per pound is what matters to you, a kit is a fair deal. If the experience is what matters, it is a good one.
Harvesting and cooking
Harvest the whole cluster at once, cutting at the base where the stems meet the block. Trim off any dry stem ends, and wipe the caps clean with a damp cloth rather than soaking them. Oyster mushrooms hold a lot of water, so a quick saute in a hot pan with a little oil gives a better texture than a slow steam.

Cook oyster mushrooms the same day you harvest them when you can. They keep in the refrigerator for a few days in a paper bag, and they lose texture after that. A first flush of a pound or more cooks down into several servings, so plan a stir-fry or a pasta dish for harvest day.
After the last flush, break the spent block into the compost pile. The mycelium keeps working on the substrate, and the compost benefits from the extra fungi. If you have a shady damp corner of the garden, burying the block there sometimes gives one last outdoor flush in spring.
Troubleshooting
Nothing grows after two weeks
A kit that shows no pins after two weeks may be too dry, too cold, or too old. Mist more often, move the kit to a warmer spot, and check that the cut is open enough for pins to push through. If the block feels light and dry, soak it in a bowl of water for a few hours, drain it, and put it back in place.
Pins appear, then dry up and stop
Dried pins mean the air around the block is too dry. Mist more often, keep the humidity tent on longer, and move the kit away from heating vents and drafty windows. Pins that dry out will not recover, and the block will try again with a new set of pins if the moisture returns.
Stems are long and thin with tiny caps
Long thin stems with small caps mean the mushrooms are not getting enough fresh air. Lift the humidity tent and fan it several times a day, or leave the tent open at the bottom. The next flush should grow with shorter stems and wider caps once the air improves.
Green or black mold on the block
Green or black mold on the block is contamination, and it usually means the block was damaged or the kit was old. Small spots of mold on the surface can be cut away, and the block may still fruit. If the mold covers a large area or smells sour, compost the block and start with a fresh kit.
Frequently asked questions
Do mushroom kits need light?
They need a little indirect light, enough to tell the mushrooms which direction to grow. A kitchen counter near a window is plenty. Direct sun and grow lights dry the block out and can stall the pins, so keep the kit out of both.
Can I grow mushrooms from a kit more than once?
Yes, most oyster kits fruit two or three times. Rest the block for about two weeks after each harvest, mist it lightly once a day, and watch for the next flush. Each flush is usually smaller than the one before it.
Are homegrown oyster mushrooms safe to eat?
Oyster mushrooms grown from a kit are the same species sold in stores, and they are safe to cook and eat when harvested fresh. Never eat a wild mushroom on the basis of a photo or a guess; this guide covers kit-grown oysters only. If you want to learn more about indoor growing, see our guide on how to grow microgreens indoors, and for another winter kitchen crop, see our guide on how to grow herbs indoors in winter. A third easy indoor crop is covered in our guide on how to grow green onions indoors.
What temperature do oyster mushrooms need?
Most oyster strains fruit well between about 55 and 75 degrees, which is normal room temperature. Cooler rooms give slower growth and thicker caps, and warmer rooms give faster growth. Below about 50 degrees the pins may stall, so move the kit to a warmer spot if nothing appears.
Sources and further reading
- Cornell Small Farms Program, Mushrooms
- Cornell Small Farms Program, Indoor Production
Related reading: How to Grow Microgreens Indoors, How to Grow Herbs Indoors in Winter, How to Grow Green Onions Indoors